PvP • zone control
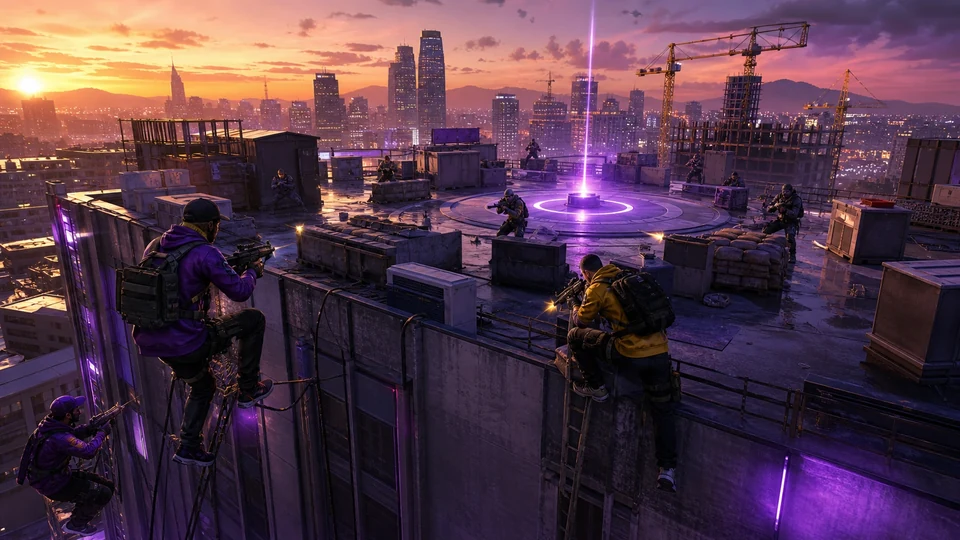
King of the Hill
A complete King of the Hill family guide: from first access through the correct index and a safe first run to repeats without mixing in temporary bonuses.
 KING / OF / THE / HILL
Complete activity guide
King of the Hill: the index and access are sourced; reward figures below are separated from events and carry their own confidence.
Start here
King of the Hill
Pause → Online → Jobs → Play Job → Rockstar Created → King of the Hill.
2–4 teams depending on map; no purchase.
If the list is empty, choose Rockstar Created and check the seven durable maps: Beach, Chamberlain Hills, Grand Senora Desert, Legion Square, Rancho Projects, Sawmill and Trainyard.
Players
2–16
Access
2–4 teams depending on map; no purchase.
Job fee
No persistent launch fee; required purchases are stated above.
01 • First completion, step by step
First completion, step by step
01 Start: Beach
- ACTION
- Choose a map and check teams/target score.
- TIP
- Enter as a team, leave an anchor on the point and cover the two shortest approaches instead of chasing kills.
- RISK / FAILURE CONDITION
- If the “2–4 teams depending on map; no purchase.” gate is not met, Beach will not save the intended progression.
- HOW TO RECOVER THE RUN
- If the list is empty, choose Rockstar Created and check the seven durable maps: Beach, Chamberlain Hills, Grand Senora Desert, Legion Square, Rancho Projects, Sawmill and Trainyard.
02 King of the Hill index
- ACTION
- Agree entry, anchor and flank.
- TIP
- Confirm “Beach” before the first launch, then progress to “Trainyard” through the index.
- RISK / FAILURE CONDITION
- Choosing an entry outside the King of the Hill index changes the mechanics or does not save this strand.
- HOW TO RECOVER THE RUN
- After a wipe regroup out of fire and make a coordinated push by another route.
03 Flow: Beach → Trainyard
- ACTION
- Enter the active zone together, then cover approaches rather than chasing kills.
- TIP
- The flank cuts off respawns but returns before the point is lost; on Trainyard/Sawmill use elevation without abandoning the scoring zone.
- RISK / FAILURE CONDITION
- Use the rail cars to split and protect approach lanes. Losing the objective before the last checkpoint requires a restart from the save.
- HOW TO RECOVER THE RUN
- After a wipe regroup out of fire and make a coordinated push by another route.
04 Settle Trainyard
- ACTION
- Finish “Trainyard”, remain through the result screen and confirm this family's progress save.
- TIP
- After settlement verify that King of the Hill marks its final entry complete.
- RISK / FAILURE CONDITION
- Leaving before the “Trainyard” result can forfeit progression or reward.
- HOW TO RECOVER THE RUN
- Replay “Trainyard” as the correct host/operator and wait for the full session return.
05 King of the Hill replay
- ACTION
- Return to: Pause → Online → Jobs → Play Job → Rockstar Created → King of the Hill. Then choose a named indexed entry rather than a random family.
- TIP
- Enter as a team, leave an anchor on the point and cover the two shortest approaches instead of chasing kills.
- RISK / FAILURE CONDITION
- A missing “Beach” indicates an unmet gate or different pool, not permanent removal of the whole family.
- HOW TO RECOVER THE RUN
- If the list is empty, choose Rockstar Created and check the seven durable maps: Beach, Chamberlain Hills, Grand Senora Desert, Legion Square, Rancho Projects, Sawmill and Trainyard.
02 • Variants and mechanics
Variants and mechanics
Beach
2–16Pause → Online → Jobs → Play Job → Rockstar Created → King of the Hill.
- OBJECTIVE
- Control the exposed hill on the beach.
- MECHANIC
- Approach from promenade cover, hold the edge of the zone and use vehicles only as temporary cover on open sand.
- COMPLETION
- Points accrue while holding the hill; the map ends at the limit or timer.
- HOW TO RECOVER THE RUN
- After being pushed off the beach regroup behind the promenade and re-enter from two sides.
Chamberlain Hills
2–16Pause → Online → Jobs → Play Job → Rockstar Created → King of the Hill.
- OBJECTIVE
- Contest urban zones and rooftop approaches.
- MECHANIC
- Control stairs and rooftops, keep the anchor in the zone and use the flanker to deny urban approaches.
- COMPLETION
- Chamberlain settles active-zone control points to the lobby limit.
- HOW TO RECOVER THE RUN
- If the roof is lost retake the stairs and a shared angle first; do not send the anchor out of zone.
Grand Senora Desert
2–16Pause → Online → Jobs → Play Job → Rockstar Created → King of the Hill.
- OBJECTIVE
- Control the exposed desert hill and its long vehicle approaches.
- MECHANIC
- Take hard cover at the desert zone edge, keep an anchor in the centre and use vehicles to deny long approaches.
- COMPLETION
- Grand Senora Desert awards points for actual team presence on the exposed hill.
- HOW TO RECOVER THE RUN
- Under long-range fire pull the anchor behind rock or vehicle cover and send the flank wide; do not abandon the whole zone.
Legion Square
2–16Pause → Online → Jobs → Play Job → Rockstar Created → King of the Hill.
- OBJECTIVE
- Control the central square while denying the surrounding streets and rooftops.
- MECHANIC
- Enter the square from two streets, keep the anchor central and clear stairs, balconies and rooftops overlooking the zone.
- COMPLETION
- Legion Square ends when the control target is reached or the lobby timer expires.
- HOW TO RECOVER THE RUN
- If the enemy locks the streets, regroup behind a building and change approach; do not feed the same lane one by one.
Rancho Projects
2–16Pause → Online → Jobs → Play Job → Rockstar Created → King of the Hill.
- OBJECTIVE
- Control the tight passages through Rancho Projects.
- MECHANIC
- In tight passages hold short angles, throw grenades behind entry cover and keep the teammate's retreat clear.
- COMPLETION
- Rancho ends at the score target or when control time expires.
- HOW TO RECOVER THE RUN
- After a wipe regroup outside the projects and retake one lane; contesting every entrance at once splits the team.
Sawmill
2–16Pause → Online → Jobs → Play Job → Rockstar Created → King of the Hill.
- OBJECTIVE
- Use industrial cover and elevation around the sawmill.
- MECHANIC
- Use timber stacks and elevation, keep the anchor in the zone and let cover deny long sight lines.
- COMPLETION
- Sawmill scores only while the hill is actually controlled.
- HOW TO RECOVER THE RUN
- If the elevated flank falls, pull the anchor behind hard cover and retake high ground before an open push.
Trainyard
2–16Pause → Online → Jobs → Play Job → Rockstar Created → King of the Hill.
- OBJECTIVE
- Use the rail cars to split and protect approach lanes.
- MECHANIC
- Use rail cars to break sight lines, take a side lane and preserve an emergency exit across the zone.
- COMPLETION
- Trainyard ends when a team reaches the required control score or the timer expires.
- HOW TO RECOVER THE RUN
- When flanked rotate behind the next rail car and reverse the defensive angle; do not chase outside the zone.
03 • Real roles / Strategies
Real roles i Strategies
Zone anchor
Stays on the hill to score.
Flank
Stops approaches without abandoning the objective unnecessarily.
Enter as a team, leave an anchor on the point and cover the two shortest approaches instead of chasing kills.
The flank cuts off respawns but returns before the point is lost; on Trainyard/Sawmill use elevation without abandoning the scoring zone.
04 • Reward and economic status
Zone/lobby result • no sustainable $/h
Pay depends on the specific Job, result, time and settings. There is no single defensible family-wide table, so no sustainable $/h or event multiplier is calculated.
Observed range specific to this activity; variant, result, duration or completion condition selects the value within it. Event multipliers are excluded.
B • community-reportedThe formula and roles apply to the stated settlement unit; event multipliers are excluded.
B • community-reportedRepeats follow normal Job availability; one-time awards and weekly bonuses are not baseline pay.
CONFIDENCE: Index/access B; variable economics05 • Common mistakes and recovery
Common mistakes and recovery
Kills do not increase the score
At least one player must remain in the active zone and score time.
The whole team dies on entry
Regroup out of fire, use cover and enter on two routes.
The flanker never returns to the hill
Set a return trigger: when the anchor loses armour or a second enemy enters the zone.
06 • Readiness checklist
Readiness checklist
- I know the map and target score
- The anchor remains in the zone
- The flank covers the shortest approach
- After a wipe we wait for a coordinated push
- I do not turn zone control into a Deathmatch
07 • What next
What next
VIDEO
Video walkthrough
Current search · EN
Find a current walkthrough: King of the Hill
Text-only curation on 2026-08-29 found no adequate complete English walkthrough. These are specific results for King of the Hill; choose a current guide.
No verified direct video has been found in this language yet. The link opens activity-specific results so you can choose a current walkthrough.
- Channel
- YouTube
- Checked
- 29 Aug 2026