Bunker + MOC • 8 missions
Mobile Operations
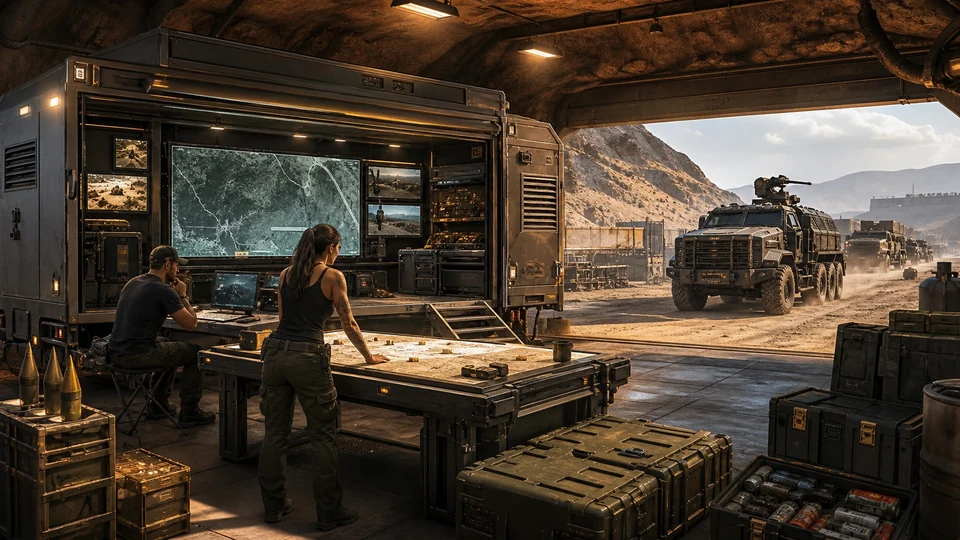
Eight co-operative Gunrunning missions from the Mobile Operations Center screen. Progress unlocks through completed Bunker resupply thresholds and is separate from stock sales or VIP/CEO Work.
 MOBILE / OPERATIONS
Complete activity guide
The index, requirements and thresholds are officially supported. Economics use the official Contact Mission time/difficulty mechanism, but no single published maximum table covers all eight Jobs, so the family remains unranked.
Start here
Mobile Operations
Buy a Bunker from Maze Bank Foreclosures, then the Mobile Operations Center from Warstock. Enter the Command Center module—or the default Living Quarters with the operations screen—and use the large touchscreen to choose an unlocked mission.
A Bunker starts at $1,165,000 and the MOC at $1,225,000; the Command Center is an optional reported $320,000 configuration, while the operations screen also exists in Living Quarters. Missions require 2–4 players and run on all supported platforms.
If the list is empty, launch and complete Resupply missions for your own Bunker—buying supplies does not count as a completed steal. If the screen is absent, check the MOC module configuration in Warstock.
Property
Bunker • from $1,165,000
Terminal
MOC • from $1,225,000 • screen in Living Quarters or Command Center
Players
2–4 • no solo launch
Progress
Completed Bunker resupply steals: 2–14
01 • First completion, step by step
First completion, step by step
01 Activate the Bunker and MOC
- ACTION
- Complete the Bunker introduction, buy the MOC, configure Living Quarters or Command Center and request it via Services → Mobile Operations Center.
- TIP
- The Command Center adds weapon stations but is not the only module containing the operations screen.
- RISK / FAILURE CONDITION
- Buying the MOC without an active Bunker does not open mission thresholds.
- HOW TO RECOVER THE RUN
- Return to the Bunker, complete its setup and then check the MOC screen.
02 Build the Resupply counter
- ACTION
- At the Bunker laptop choose Steal Supplies and carry each theft through settlement; thresholds 2/4/6/8/10/12/14 unlock successive entries.
- TIP
- Buying supplies is convenient for production but does not replace the required completed steals.
- RISK / FAILURE CONDITION
- An interrupted delivery does not increase the count even if some supplies were collected.
- HOW TO RECOVER THE RUN
- Repeat Steal Supplies and wait for the Bunker delivery message before launching again.
03 Launch Severe Weather Patterns
- ACTION
- After two completed Resupplies gather 2–4 players, use the MOC touchscreen and select the first mission.
- TIP
- Assign one driver/pilot and one gunner before launch; mission vehicles have distinct stations.
- RISK / FAILURE CONDITION
- Everyone trying to drive leaves the weapon station unmanned.
- HOW TO RECOVER THE RUN
- Stop under cover, swap seats and continue only after confirming assignments.
04 Advance through thresholds
- ACTION
- After each new mission return to Bunker Resupply until the count reaches 14; Data Breach must be completed before Work Dispute.
- TIP
- Record each threshold and unlock; the screen does not present one shared linear campaign.
- RISK / FAILURE CONDITION
- Fourteen steals without completing Data Breach will not unlock Work Dispute.
- HOW TO RECOVER THE RUN
- Host Data Breach and wait for settlement, then return to the MOC screen.
05 Settle the Job and Trade Price
- ACTION
- After delivery or the final target is destroyed wait for the results screen; first completion as leader unlocks the relevant showcased vehicle trade price.
- TIP
- The Trade Price is a permanent unlock and is not part of the Job's cash payout.
- RISK / FAILURE CONDITION
- Leaving before the result screen may fail to save the price or completion.
- HOW TO RECOVER THE RUN
- Replay that mission as leader and wait for the complete return to Freemode.
02 • Variants and mechanics
Variants and mechanics
1. Severe Weather Patterns
2–4 • Dune FAV2 completed Resupplies.
- OBJECTIVE
- Disrupt Merryweather air transport and deliver the Dune FAV.
- MECHANIC
- The driver keeps moving while the gunner destroys Cargobobs and Titans; after the targets fall the team drives the FAV to the drop-off.
- COMPLETION
- The Dune FAV reaches delivery; the leader unlocks its Trade Price.
- HOW TO RECOVER THE RUN
- When the turret lacks an angle the driver circles wide rather than stopping under fire; after flipping the FAV use respawn/checkpoint recovery.
2. Half-track Bully
2–4 • driver + gunner4 completed Resupplies.
- OBJECTIVE
- Breach the base, seize the Half-track and deliver it to Agent 14.
- MECHANIC
- Hack access, clear the crew, seat a driver and gunner in the Half-track and break through the pursuit.
- COMPLETION
- The Half-track reaches the hand-off; the leader gains its Trade Price.
- HOW TO RECOVER THE RUN
- If the gunner dies the driver reverses into cover; do not enter the next roadblock with an empty turret.
3. Exit Strategy
2–4 • AA Trailer6 completed Resupplies.
- OBJECTIVE
- Protect three dignitary aircraft at LSIA until departure.
- MECHANIC
- Tow the Anti-Aircraft Trailer between positions, destroy air and ground waves and extract after all three aircraft depart safely.
- COMPLETION
- All three aircraft depart and the AA Trailer is delivered; the leader unlocks its Trade Price.
- HOW TO RECOVER THE RUN
- If an aircraft loses health switch fire to the nearest helicopter rather than chasing distant targets; after a wipe resume the last defence.
4. Offshore Assets
2–4 • APC8 completed Resupplies.
- OBJECTIVE
- Recover underwater packages from a wreck and deliver them in the APC.
- MECHANIC
- The APC reaches the coast, divers collect crates, the gunner covers resurfacing and the driver extracts the cargo.
- COMPLETION
- The required packages and APC reach the destination; the leader receives the Trade Price.
- HOW TO RECOVER THE RUN
- Do not send the whole team underwater: keep a gunner topside. If a package is dropped, clear boats before returning to the wreck.
5. Cover Blown
2–4 • MOC + Weaponized Tampa10 completed Resupplies.
- OBJECTIVE
- Escort the mobile command centre through an ambush without allowing enemies to maintain missile lock.
- MECHANIC
- The MOC driver maintains speed, the Weaponized Tampa destroys lock-on vehicles and the rest cover blind spots to extraction.
- COMPLETION
- The MOC completes the route; the leader unlocks the Weaponized Tampa Trade Price.
- HOW TO RECOVER THE RUN
- When lock-on builds, do not stop the truck: the escort doubles back for the marked threat while the MOC keeps a controlled route.
6. Mole Hunt
2–4 • Weaponized Tampa12 completed Resupplies.
- OBJECTIVE
- Destroy signal jammers, locate the rogue agent and eliminate them before delivering the vehicle.
- MECHANIC
- The Tampa crew removes each jammer, triangulates the target, conducts the hit and extracts to the hand-off.
- COMPLETION
- The rogue agent is eliminated and the Weaponized Tampa reaches delivery; the leader receives the Trade Price.
- HOW TO RECOVER THE RUN
- If the next jammer is lost, return to the last marker and recheck the map after interference clears; with a damaged Tampa fight from cover.
7. Data Breach
2–4 • Oppressor14 completed Resupplies.
- OBJECTIVE
- Disrupt the data operation, steal the Oppressors and escape into the cargo plane.
- MECHANIC
- Enter the tunnel, clear the facility, take the bikes, escape the pursuit and fly through the moving cargo plane ramp.
- COMPLETION
- All required players reach the plane on Oppressors; the leader unlocks the Trade Price.
- HOW TO RECOVER THE RUN
- After missing the ramp regain altitude and line up another straight approach; do not make a sharp turn immediately behind the plane.
8. Work Dispute
2–4 • Oppressor14 Resupplies + Data Breach completed.
- OBJECTIVE
- Attack rival Mobile Operations Centers and deliver the stolen Oppressors.
- MECHANIC
- Deploy from the cargo plane on Oppressors, destroy the marked MOCs and escorts, then take the surviving bikes to the drop-off.
- COMPLETION
- Rival MOCs are destroyed and the team delivers the Oppressors; the leader gains the Trade Price.
- HOW TO RECOVER THE RUN
- Do not hover over turrets: make attack passes, break lock-on with buildings and after losing a bike use the checkpoint rather than waiting under fire.
03 • Real roles / Strategies
Real roles i Strategies
MOC leader
Launches unlocked missions, tracks Resupply thresholds and receives the permanent Trade Price after first completion.
Driver / pilot
Maintains the mission vehicle's position without denying the gunner an angle; in Data Breach each player controls their own Oppressor.
Gunner / diver
Operates the turret or retrieves underwater packages depending on the Job. The team does not assign both jobs to one person simultaneously.
Start with a complete driver–gunner pair, run Resupplies between missions and treat the Trade Price as progression rather than a cash bonus.
With four players, two crew the vehicle, one clears ahead and one preserves the last life/checkpoint. In dive missions only part of the team goes underwater.
04 • Reward and economic status
Contact Mission mechanism • payout depends on Job, time and difficulty
Rockstar uses completion-time scaling: a very fast run pays part of the maximum, while around 15 minutes reaches the full base; Normal and Hard increase the result, as does a larger team. The eight Jobs have no single current official maximum table, so no invented range or $/h is shown.
Observed range specific to this activity; variant, result, duration or completion condition selects the value within it. Event multipliers are excluded.
B • community-reportedThe formula and roles apply to the stated settlement unit; event multipliers are excluded.
B • community-reportedNo shared persistent cooldown; progression is gated by completed Resupply steals and Data Breach before the finale.
CONFIDENCE: Index/thresholds/mechanism A • per-Job maxima unpublished05 • Common mistakes and recovery
Common mistakes and recovery
Buying supplies does not unlock missions
Choose Steal Supplies and complete delivery to the Bunker; completed thefts are what count.
Trying to launch solo
Mobile Operations require at least two players; invite a Prospect/Associate before using the MOC screen.
Work Dispute remains locked
Reach 14 Resupplies and complete Data Breach as leader; the count alone is insufficient.
06 • Readiness checklist
Readiness checklist
- I own an active Bunker and MOC
- The MOC has an operations screen
- I have at least one partner
- I track thresholds 2/4/6/8/10/12/14
- Data Breach is completed before Work Dispute
07 • What next
What next
VIDEO
Video walkthrough
Verified video · EN
GTA Online Career Progress - Mobile Operation Missions [Tier 2 & Tier 4 Challenges Guide]
All eight Mobile Operations, their unlock order and mission-specific challenge flow; retained for mechanics.
- Channel
- GTA Series Videos
- Published
- 10 Jul 2023
- Checked
- 29 Aug 2026