Business • Solo / Duo / Trio / Quatro
Bunker Stock Sale
The business card separates entry cost, production or stock preparation, the owner's sale payout and every helper's actual reward.
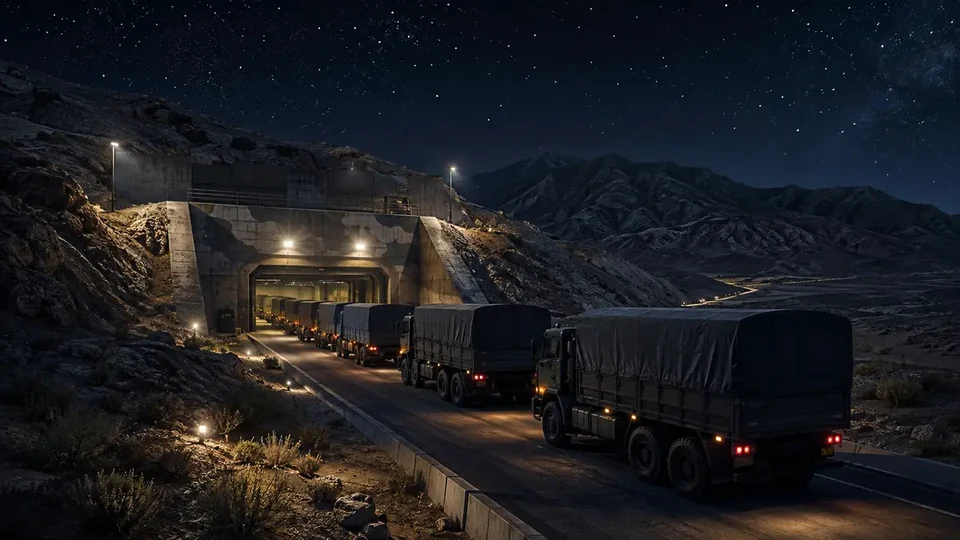 BUNKER / STOCK
01
Complete financial model
7 hrs 50 min • range: 2 hrs 20 min–11 hrs 40 minThere is no separate sale cooldown; another full result requires a new production cycle.
the sale goes to the owner and every helper receives an extra bonus; it is not deducted from the owner
02
Bunker: from the Duneloader setup to the first weapon sale
BUSINESS STEP BY STEP • COMPLETE WALKTHROUGH
A Gunrunning onboarding that separates the Bunker purchase, one-time setup, Manufacturing versus Research, bought or stolen supplies and a realistic solo or crew delivery scope.
Start here
The correct menu, location and first entry point for the Bunker and Gunrunning.
Buy a Bunker through Maze Bank Foreclosures. Cheapest Paleto Forest is far from many routes; location affects convenience, not access.
After purchase, the Bunker marker appears. Enter down the main ramp, watch the Agent 14 introduction and approach the Disruption Logistics laptop.
Register as VIP/CEO or MC President, sign into the laptop and choose Set Up.
- The laptop is unavailable without an active organisation/MC or during another job.
- If Set Up is gone, check whether staff are present and Disruption Logistics shows normal bars.
- A Facility does not replace a Bunker; they are separate properties and systems.
From zero to the first payout
Buy a Bunker, deliver the setup Duneloader, assign staff to Manufacturing, consume the first supplies and sell a small batch.
- 011. Buy and enter a BunkerFrom $1,165,000; purchase-page extras are optional for production.
- 022. Steal the setup DuneloaderSet Up leads to an Ammu-Nation; take the supply truck and deliver it to the Bunker.
- 033. Staff → ManufacturingFor the first cycle, disable the Research split so all progress goes to Stock.
- 044. Consume the first suppliesSetup provides an initial bar; play online and verify Supplies fall while Stock rises.
- 055. Sell a small batchChoose the near or distant market and launch a threshold manageable with one vehicle.
One-time Bunker Setup — Duneloader
Every step states the objective, actions, completion condition and a safe way back after a mistake.
01 Bunker Set Up — Duneloader
Goal Deliver the full initial supply bar and activate Disruption Logistics.
Key actions - Choose Set Up on the laptop and leave the Bunker.
- Travel to the marked Ammu-Nation, secure the Duneloader and enter the truck.
- Deliver the Duneloader to the yellow point at the Bunker ramp; do not stop for respawning enemies.
Completion point The truck enters the Bunker, staff begin work and the laptop shows a full initial Supplies bar.
What it unlocks next Manufacturing, Research, supply buying/theft, Upgrades and Sell Stock.
How to recover the run Destroying the Duneloader fails the attempt but does not remove the Bunker. Relaunch Set Up from the laptop; clear the exit before moving rather than firing near the truck.
Requirements, purchase and entry budget
The cheapest Bunker costs $1,165,000. The MOC, quarters, shooting range, transport and Gun Locker are extras and are not required for first production.
Bunker — required property
Status
From $1,165,000 through Maze Bank Foreclosures.
- Choose a location with returns and Los Santos routes in mind.
- Do not add an MOC or shooting range for the first cycle.
Setup Duneloader — free start
Status
The one-time mission provides initial Supplies; it is not a vehicle purchase.
- Steal the truck from Ammu-Nation.
- Deliver it intact to the Bunker ramp.
Operating budget
Status
Stealing Supplies costs $0; buying costs $15,000 per 20% or $75,000 for a full bar.
- Use the setup's initial bar without another purchase.
- Later, buy only after accounting for upgrades and net value.
First complete cycle
After setup, complete these actions in the Bunker and Gunrunning before attempting the first settlement.
01 Select Manufacturing
ActionOn Disruption Logistics, choose Manage Staff and assign everyone to Manufacturing.
How to verifyThe staff diagram must show Manufacturing rather than Research or Both.
How to recover the runIf unavailable, finish the setup Duneloader and sign in again as an organisation/MC.
02 Check first Stock growth
ActionPlay online, then later return to the laptop or Bunker indicators.
How to verifySupplies fall, Stock rises and Research takes no progress.
How to recover the runWith empty Supplies, launch theft or buy. With full Stock, sell first.
03 Choose market and threshold
ActionOn Sell Stock, compare local and distant delivery, but launch a small value for the first run.
How to verifyImmediately check vehicle count after launch; one driver cannot safely handle every full-stock variant.
How to recover the runWhen the variant exceeds crew capacity, do not repeat full stock without help; rebuild a smaller threshold.
Weapon manufacturing, Research and supplies
Supplies can feed Manufacturing, Research or a split. For the first sale, assign all staff to Manufacturing and verify Stock rises.
Only the Manufacturing allocation builds sellable Stock.
Buying does not grant instant Stock; it feeds later online production.
More Stock can mean several vehicles; count depends on the selected mission.
Choose sourcing method and pace
Steal Supplies
$0Agent 14 assigns a variant; secure the cargo and deliver it to the Bunker.
Buy Supplies
$15,000 / 20% • $75,000 / full barDelivery arrives after a delay; do not log out expecting instant progress.
BASELINE, NOT AN EVENTResearch, Ammu-Nation excess parts and the public bonus are separate systems. Weekly multipliers are not included.
Upgrades after the first cycle
Upgrades are separate purchases. This guide identifies those that change operating results and those that affect only convenience or risk.
After the first sale, open Upgrades in Disruption Logistics.
Equipment and Staff improve speed, Stock value and supply efficiency; Security reduces theft risk.
Upgrades are available after setup with no separate cooldown.
The laptop shows purchased upgrades and Manufacturing/Research statistics.
Decision order
Equipment
Speeds Manufacturing and Research, increases Stock value and supply efficiency.
Staff
Further improves staff speed and value.
Security
Reduces the chance of a stock attack.
Equipment → Staff → Security. Buy property extras later for convenience, not as production upgrades.
- Equipment and Staff change the cycle model.
- Security reduces raid risk.
- The MOC, shooting range and quarters do not speed Stock.
Solo or crew — concrete assignment
Batch size and delivery-vehicle count matter more than the warehouse's nominal maximum value.
SOLO — controlled Stock
Produce and sell a small batch before the mission can create several vehicles.
CONCRETE ROLES
- The owner drives the only vehicle and completes all points.
- In the Phantom Wedge, ignore police; in an Insurgent/Dune/Marshall, prioritise timer and objectives.
DUO–QUAD — larger batches
Each driver takes a separate vehicle; a passenger mans the weapon in armed Insurgents.
CONCRETE ROLES
- The leader launches, chooses the market and assigns vehicles.
- The slowest Dune/Marshall leave first; fast returns must not delay them.
First Bunker stock sale
Check batch state and team first, then deliberately choose a session and launch settlement from the correct terminal.
- Staff assigned to Manufacturing and Stock sized to the crew.
- Near/distant market choice and Invite Only for the first run.
- Snacks, armor and a gunner for an armed Insurgent.
- Choose Sell Stock on Disruption Logistics.
- Compare Blaine County with Los Santos and deliberately confirm the longer market.
- On exit, immediately count vehicles and read Agent 14's mission type.
The roll includes Phantom Wedge, Insurgent Pick-Up Custom, jammer Insurgents, Dune FAV or Marshalls; a larger batch can create up to three vehicles.
Safety or public-session bonus
Invite-only session — first run
Benefit
Removes rival risk while retaining the full NPC variant and timer.
Risk / failure condition
No rival-player bonus; mechanics and baseline settlement remain unchanged.
Public session — deliberate risk
Benefit
A rival-count high-demand bonus may apply; it is not part of this guide's baseline values.
Risk / failure condition
All vehicles become rival targets and the public bonus is not a baseline rate.
Delivery families and response
Phantom Wedge — single destination
How to recognise it
One truck and trailer with a distant destination; police pursuit begins en route.
Action
Maintain speed, use the wedge through roadblocks and drive directly to the buyer.
Tip
Do not stop to lose police — the pursuit ends at the destination.
Risk / failure condition
Destroying the cab or trailer can end the delivery.
How to recover the run
If the cab fails, another truck/Cargobob can recover the trailer when time and equipment allow; otherwise prioritise surviving vehicles.
Insurgents — shared drop or five ambushes
How to recognise it
The HUD shows one destination or five Merryweather stops; the jammer variant requires staying together.
Action
At ambushes, the driver positions the vehicle as cover, the gunner clears the wave, then the team moves on.
Tip
In the no-ambush variant, do not seek fights; deliver each vehicle to its assigned point.
Risk / failure condition
Separating jammer vehicles disables cover; in ambush runs helicopters arrive at later stops.
How to recover the run
Regroup vehicles if the jammer drops. Without a gunner, use armor and eliminate only enemies blocking the next stop.
Dune FAV / Marshall — multi-drop
How to recognise it
Several light vehicles, a short shared timer and four/five drops per vehicle.
Action
Each driver takes one vehicle; solo, start with the slowest and follow the route without fighting respawning pursuit.
Tip
The Marshall needs care on slopes and the Dune exposes its driver — movement beats fighting.
Risk / failure condition
Rolling or sticking one vehicle quickly consumes the shared time.
How to recover the run
If the vehicle cannot be righted in seconds, move to a survivor and finish its full route rather than losing all of them.
The owner is paid after deliveries and helpers receive a separate bonus under the existing model. Deduct bought Supplies; do not add a weekly multiplier to the baseline batch.
What to do next
A repeatable loop after the first successful payout, with cost and risk checked before the next start.
- 01
Set staff priority
Manufacturing for cash, Research for unlocks; splitting slows both goals.
- 02
Resupply after a sale
Buy only when Stock has room and production is active.
- 03
Run other online activities
Production does not require staying in the Bunker.
- 04
Threshold before maximum capacity
Sell earlier solo; reserve full Stock for an arranged crew.
Common mistakes and fixes
Staff are not building Stock
FixIn Manage Staff, switch from Research/Both to Manufacturing.
Full batch without drivers
FixUse a lower threshold or arrange one driver per possible vehicle.
Buying an MOC as a requirement
FixThe MOC and property extras are optional; an activated Bunker is enough for production.
Checklist: have / done / ready to settle
HAVE
A Bunker
CEO/VIP/MC laptop access
DONE
Setup Duneloader delivered
Staff assigned to Manufacturing
Stock growing from Supplies
READY TO SELL
Threshold matched to drivers
Chosen market and session
Common blockers and recovery
Repair the business or current mission state; do not repurchase a property as a workaround.
The Disruption Logistics laptop is locked
Check in order
- Register as CEO/VIP/MC.
- Finish other work and check the session organisation limit.
Supplies fall but Stock does not grow
Check in order
- Check Manage Staff — progress may be going to Research.
- Check for full Stock capacity.
I did not complete every vehicle
Check in order
- After returning, inspect actual deposit and Stock.
- Record the vehicle type and threshold that exceeded the crew.
03
Expanded informational overview
Guide scopeThis section organizes the complete cycle: requirements, phases, figures and dependencies. The detailed operation flow is in the walkthrough above.
Time and hourly results include stock or income accrual. The final delivery is only one part of the complete cycle.
04
How the full cycle works
This section complements the walkthrough with full-cycle dependencies: unlock, preparations, finale, settlement and the next available attempt.
Purchase and unlock
The base requirement is Bunker; the minimum entry cost is shown in the financial panel.
Setup
The business must be configured and remain active. Upgrades should be evaluated separately from the property price.
Production / accrual
The full time model uses 7 hrs 50 min as the typical cycle.
Sale or collection
The panel separates owner proceeds, costs, commissions and extra helper rewards.
Next cycle
There is no separate sale cooldown; another full result requires a new production cycle.
05
What affects the result
The range shows small, typical and full variants where value is variable.
Supply costs and agent fees are deducted before the owner's result.
Owner proceeds plus a separate reward for each helper. The sale value is not split equally.
The comparison uses 2 hrs 20 min / 7 hrs 50 min / 11 hrs 40 min for the complete cycle.
Main strengths
- Can combine active sales with passive value accrual.
- Helpers do not automatically reduce the owner's proceeds.
Constraints
- Purchase payback depends on regular use.
- A helper's reward can be far lower than the owner's proceeds and is shown separately.
06
Solo / Duo / Trio / Quatro variants
Every supported team size shows its host, partner and team model. Provisional rates are clearly labelled, and incomplete data is explained alongside the result.
Solo: full pace control and no crew wait.
- Host / owner
- $450,000
- Team net
- $450,000
- Production cycle
- 7 hrs 50 minrange: 2 hrs 20 min–11 hrs 40 min
Duo: the owner keeps the proceeds and 1 helper receive separate rewards.
- Host / owner
- $450,000
- Each partner
- $60,000
- Team net
- $510,000
- Production cycle
- 7 hrs 50 minrange: 2 hrs 20 min–11 hrs 40 min
Trio: the owner keeps the proceeds and 2 helpers receive separate rewards.
- Host / owner
- $450,000
- Each partner
- $60,000
- Team net
- $570,000
- Production cycle
- 7 hrs 50 minrange: 2 hrs 20 min–11 hrs 40 min
Quatro: the owner keeps the proceeds and 3 helpers receive separate rewards.
- Host / owner
- $450,000
- Each partner
- $60,000
- Team net
- $630,000
- Production cycle
- 7 hrs 50 minrange: 2 hrs 20 min–11 hrs 40 min
07
Complete figures by team
Typical values for the selected cycle; every cell also contains a min–max range.
| Team | Cooldown | Team gross | Costs + fees | Host / owner | Each partner | Team net | Host / owner $/h | Team $/h |
|---|---|---|---|---|---|---|---|---|
| SOLO | 7 hrs 50 minProduction cycle • range: 2 hrs 20 min–11 hrs 40 min | $700,000min: $210,000 · typical: $700,000 · max: $1,050,000 | $250,000min: $75,000 · typical: $250,000 · max: $375,000 | $450,000min: $0 · typical: $450,000 · max: $975,000 | — | $450,000min: $0 · typical: $450,000 · max: $975,000 | $57,447min: $0 · typical: $57,447 · max: $124,468 | $57,447min: $0 · typical: $57,447 · max: $124,468 |
| DUO | 7 hrs 50 minProduction cycle • range: 2 hrs 20 min–11 hrs 40 min | $700,000min: $210,000 · typical: $700,000 · max: $1,050,000 | $250,000min: $75,000 · typical: $250,000 · max: $375,000 | $450,000min: $0 · typical: $450,000 · max: $975,000 | $60,000min: $21,000 · typical: $60,000 · max: $60,000 | $510,000min: $21,000 · typical: $510,000 · max: $1,035,000 | $57,447min: $0 · typical: $57,447 · max: $124,468 | $65,106min: $2,681 · typical: $65,106 · max: $132,128 |
| TRIO | 7 hrs 50 minProduction cycle • range: 2 hrs 20 min–11 hrs 40 min | $700,000min: $210,000 · typical: $700,000 · max: $1,050,000 | $250,000min: $75,000 · typical: $250,000 · max: $375,000 | $450,000min: $0 · typical: $450,000 · max: $975,000 | $60,000min: $21,000 · typical: $60,000 · max: $60,000 | $570,000min: $42,000 · typical: $570,000 · max: $1,095,000 | $57,447min: $0 · typical: $57,447 · max: $124,468 | $72,766min: $5,362 · typical: $72,766 · max: $139,787 |
| QUATRO | 7 hrs 50 minProduction cycle • range: 2 hrs 20 min–11 hrs 40 min | $700,000min: $210,000 · typical: $700,000 · max: $1,050,000 | $250,000min: $75,000 · typical: $250,000 · max: $375,000 | $450,000min: $0 · typical: $450,000 · max: $975,000 | $60,000min: $21,000 · typical: $60,000 · max: $60,000 | $630,000min: $63,000 · typical: $630,000 · max: $1,155,000 | $57,447min: $0 · typical: $57,447 · max: $124,468 | $80,426min: $8,043 · typical: $80,426 · max: $147,447 |
08
Key facts
VIDEO
Video walkthrough
Verified video · EN
Bunker Business Guide: How to Make MILLIONS Completely SOLO (2026)
Purchase, upgrades, supplies, research and solo sale.
- Channel
- Hazard
- Published
- 12 Jul 2026
- Checked
- 29 Aug 2026