Mission strand • Solo / Co-op
Oscar Guzman Flies Again
Bring McKenzie Field Hangar online, seize Eberhard aircraft and equipment, then capture the Titan 250 D and strike three corporate targets.
 OSCAR / GUZMAN
01
Complete financial model
Rotation-dependent • no single fixed minute valueThere is no single confirmed minute value; availability depends on a board, phone call or contract rotation.
host and partner payouts are calculated separately
02
Complete step-by-step operation
OPERATIONS GUIDE V2 • SOLO
Bring McKenzie Field Hangar online, seize Eberhard aircraft and equipment, then capture the Titan 250 D and strike three corporate targets.
Start here
- Buy the McKenzie Field Hangar after receiving Oscar Guzman's offer and complete its setup.
Use the operations station in the hangar to launch Up and Running, followed by the finale setups.
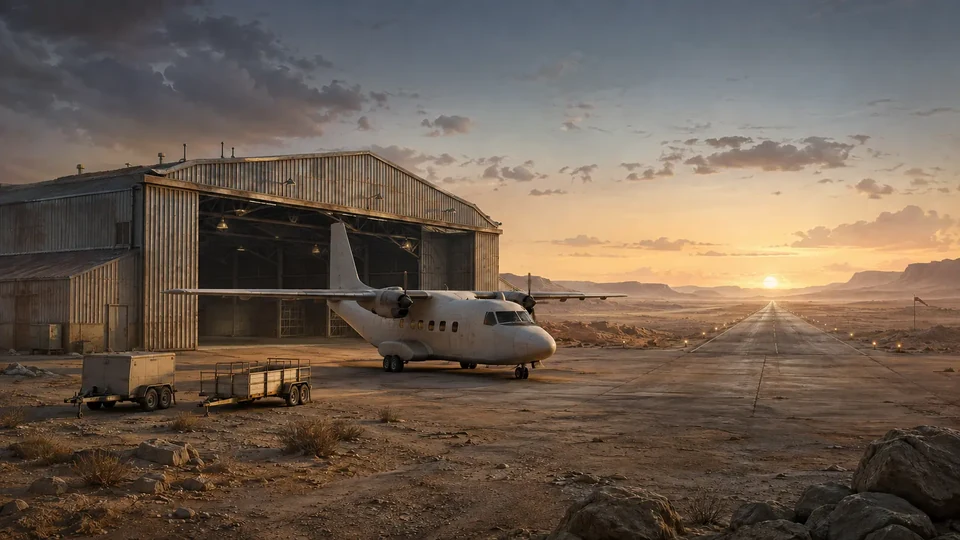
McKenzie Field Hangar in Grapeseed.
Oscar's operation planning station inside the hangar.
- Other hangars, personal aircraft and their workshops neither replace McKenzie Field Hangar nor unlock the strand.
First run and replay
These are two persistent story instructions. They are not the finance calculator's weekly-variant switch.
First story playthrough
The first run includes McKenzie Field Hangar setup, Up and Running, four named setups, equipment selection and the complete Titan-interception finale.
Story replay
Launch a replay from Oscar's station in McKenzie Field Hangar and repeat the setups needed to seize, repair, load and return the Titan.
Official mission order
- 01
setup Up and Running
Bring the McKenzie Field Hangar and Oscar's operation station online.
- 02
setup Setup: Mogul
Steal the Mogul needed to intercept the Titan.
- 03
setup Setup: Intel
Acquire intelligence on the Titan and Eberhard's operation route.
- 04
setup Setup: Iron Mule
Secure the vehicle used to load the recovered equipment.
- 05
setup Setup: Ammunition
Prepare the ammunition and weapons needed for the interception.
- 06
finale The Titan Job
Intercept the Titan, repair it, complete its cargo and return to McKenzie Field.
Strategies that genuinely change the route
Layered Titan interception
- When
- After preparing the Mogul, intel, Iron Mule and ammunition.
- Plan
- Take and repair the Titan first, load it with the Iron Mule, remove the three Eberhard targets and return to McKenzie Field.
- Trade-off
- A pilot–gunners–cargo split speeds the finale, but the Titan must survive every phase.
Plan for the selected team: SOLO
Selected in the calculator • SOLO for “Oscar Guzman Flies Again — complete flow”: SOLO operator: Titan pilot + Air-defence gunner + Iron Mule operator + Eberhard target hunter.
Concrete roles
Keeps the aircraft positioned safely, completes repairs and flies back to McKenzie. Clears the escort during interception and protects the stationary Titan during repairs. Delivers and transfers cargo without hitting the Titan or blocking its ramp. Finds and removes the three marked targets while tracking fuel and the return route.
Actions, risk and run recovery
- 01
unlockMcKenzie Field Hangar - Action
- Buy McKenzie Field Hangar and start Up and Running. The selected difficulty applies to the entire strand unless it is cancelled by calling Oscar.
- Tip
- Finish the McKenzie Field Hangar setup and use Oscar's station, not a standard Hangar.
- Risk / failure condition
- Another Hangar does not unlock the Flies Again strand.
- How to recover the run
- Return to McKenzie, finish the introduction and launch from its laptop.
- 02
prep / preparationUp and Running - Action
- Intercept the Aztecas' Streamer216, seize its cargo and deliver it to Oscar's buyer; Eberhard's attack on the sale opens the wider operation.
- Tip
- In Up and Running choose difficulty deliberately and take the seized cargo to the buyer.
- Risk / failure condition
- An abandoned delivery or later difficulty change resets the active strand.
- How to recover the run
- Recover the buyer route; if changing difficulty, cancel with Oscar before restarting.
- 03
setupSetup: Mogul - Action
- Use the supplied Velum, reach Eberhard's aircraft and steal the Mogul needed to approach the Titan. Taking the optional second plane gives Oscar separate air support in the finale.
- Tip
- In Setup: Mogul preserve the aircraft and assign its pilot before entering heavy fire.
- Risk / failure condition
- A destroyed Mogul removes the support aircraft needed for the Titan intercept.
- How to recover the run
- Move off the area, clear threats at range and retry the aircraft capture.
- 04
setupSetup: Intel - Action
- Reach the drone station, hack the Eberhard base servers at the port and download the Titan 250 D intelligence. Then dive to the sunken boat for the signal jammers.
- Tip
- In Setup: Intel one operator collects data while cover holds the entry and exit route.
- Risk / failure condition
- A missed terminal or device leaves the Titan intel incomplete.
- How to recover the run
- Return to the final active station and confirm all intel before extraction.
- 05
setupSetup: Iron Mule - Action
- Deploy the jammers at Redwood Lights Track, lure in a DH-7 Iron Mule and steal the helicopter. Additional Mules speed up the next job, and the Insurgent can support the crew.
- Tip
- In Setup: Iron Mule one player pilots while another leads to the ship and marks cargo.
- Risk / failure condition
- Crashing the heavy helicopter into the deck or cargo can fail the setup.
- How to recover the run
- Climb vertically, stabilize and retry the pickup from a level hover.
- 06
setupSetup: Ammunition - Action
- Use the Iron Mule hooks to lift Titan ammunition crates from the ship and place them on the trailer. Anti-aircraft guns and continuously returning guards require cover for the pilots.
- Tip
- In Setup: Ammunition deliver the marked supplies without confusing them with optional equipment.
- Risk / failure condition
- Missing required ammunition leaves the Titan Job without its full armament.
- How to recover the run
- Return for the marked package, secure the transport and confirm it at the hangar station.
- 07
prep / preparationOptional equipment - Action
- The ship also holds heavy armor, a weapon crate and Mogul upgrades. Every recovered item becomes available for selection in The Titan Job.
- Tip
- Choose optional Heavy Armor, weapon crate and Mogul upgrades before launching the Titan Job.
- Risk / failure condition
- Trying to add equipment after launch does not change the active finale.
- How to recover the run
- Stop before launch, collect the chosen extras and only then reopen the finale.
- 08
finaleIntercept the Titan - Action
- Equip the prepared gear, launch in the Mogul and approach under cover of the Titan 250 D. Attack its escort and the target until it is forced to land in the Grand Senora Desert.
- Tip
- During interception keep the Mogul with the Titan and focus fire on escorts, not the capture target.
- Risk / failure condition
- Excessive Titan damage can lose the finale's only aircraft.
- How to recover the run
- Stop firing at the target, clear escorts and resume controlled pursuit to landing.
- 09
finaleRepair and loading - Action
- Clear the landing site, board the Titan and repair its engine by pressing the buttons indicated. Wait for the acquired ammunition to be loaded before takeoff.
- Tip
- After landing the pilot repairs only once gunners clear the immediate sector, then loads from the Iron Mule.
- Risk / failure condition
- Interrupted repairs or a blocked ramp exposes the stationary Titan to destruction.
- How to recover the run
- Leave the interaction, clear the wave, move the Iron Mule off the ramp and retry in order.
- 10
finaleThree Eberhard targets - Action
- Pilot the Titan 250 D and destroy the marked Kosatka, freight train and Mobile Operations Center using the prepared weapons and crew support.
- Tip
- Set the Kosatka–train–MOC order before the first attack and avoid improvised turns.
- Risk / failure condition
- Unplanned turns extend Titan exposure and consume fuel before the final target.
- How to recover the run
- Return to the nearest target in the agreed loop, stabilize course and continue the order.
- 11
finaleReturn to McKenzie - Action
- After all three targets are confirmed destroyed, fly the Titan back to McKenzie Field and land safely on the hangar runway.
- Tip
- After all three targets set course for McKenzie immediately and keep gunners on rear cover.
- Risk / failure condition
- Unnecessary combat after the objectives can destroy the Titan before landing.
- How to recover the run
- Break from attackers, line up the approach and land only with a clear runway axis.
Common mistakes
Incomplete hangar package
- Consequence
- A missing element leaves the finale without support aircraft, intel, transport or the required ammunition.
- Correction
- Return to Oscar's station and complete the missing setup; optional equipment replaces none of the four.
Repairing the Titan under fire
- Consequence
- Interrupted repairs and fire on the stationary aircraft can destroy the finale's only vehicle.
- Correction
- Stop the interaction, take cover at the fuselage, remove the nearest wave and resume repairs only on the cover call.
Poor target and return order
- Consequence
- Chaotic turns extend the Titan's exposure and can stop the return after the targets are complete.
- Correction
- Drop the distant target for the nearest marker, stabilize altitude and return to the agreed loop.
Pre-launch checklist
Mogul, Intel, Iron Mule and Ammunition are complete at the hangar station.
Pilot, gunners and cargo operator know the repair, loading and return calls.
Finish Mogul, Intel, Iron Mule and Ammunition before choosing optional equipment.
The pilot repairs only after the immediate sector is clear while gunners take every incoming target.
Set the order of the three targets and the return course to McKenzie Field before hunting them.
03
Expanded informational overview
Guide scopeThis section organizes the complete cycle: requirements, phases, figures and dependencies. The detailed operation flow is in the walkthrough above.
04
How the full cycle works
This section complements the walkthrough with full-cycle dependencies: unlock, preparations, finale, settlement and the next available attempt.
Unlock
Requirement: McKenzie Field Hangar.
Contract selection
Availability may depend on a board, phone call or activity rotation.
Preparation
The model includes required stages before the final settlement.
Completion
Team choice affects pace, host payout and each partner's payout.
Replay or rotation
There is no single confirmed minute value; availability depends on a board, phone call or contract rotation.
05
What affects the result
Payout and time cover the complete cycle, not only its final job.
The host and every participant have separately defined payouts; the team average does not replace those values.
Setup fees and commissions are deducted before the net result.
Fast/typical/beginner: 1 hr 10 min / 1 hr 35 min / 2 hrs 20 min.
Main strengths
- Lower entry cost than major heists.
- Flexible supported team size.
Constraints
- Some contracts depend on board rotation.
- A partner may receive a different payout from the host.
06
Solo / Duo / Trio / Quatro variants
Every supported team size shows its host, partner and team model. Provisional rates are clearly labelled, and incomplete data is explained alongside the result.
Solo: full pace control and no crew wait.
- Host / owner
- $500,000
- Team net
- $500,000
- Rotation
- Rotation-dependentno single fixed minute value
Duo: the host and 1 partner have separate payouts.
- Host / owner
- $500,000
- Each partner
- $50,000No official partner rate — the value is reported by aligned secondary and community sources (confidence B).
- Team net
- $550,000
- Rotation
- Rotation-dependentno single fixed minute value
Trio: the host and 2 partners have separate payouts.
- Host / owner
- $500,000
- Each partner
- $50,000No official partner rate — the value is reported by aligned secondary and community sources (confidence B).
- Team net
- $600,000
- Rotation
- Rotation-dependentno single fixed minute value
Quatro: the host and 3 partners have separate payouts.
- Host / owner
- $500,000
- Each partner
- $50,000No official partner rate — the value is reported by aligned secondary and community sources (confidence B).
- Team net
- $650,000
- Rotation
- Rotation-dependentno single fixed minute value
07
Complete figures by team
Typical values for the selected cycle; every cell also contains a min–max range.
| Team | Cooldown | Team gross | Costs + fees | Host / owner | Each partner | Team net | Host / owner $/h | Team $/h |
|---|---|---|---|---|---|---|---|---|
| SOLO | Rotation-dependentRotation • no single fixed minute value | $500,000min: $500,000 · typical: $500,000 · max: $500,000 | $0min: $0 · typical: $0 · max: $0 | $500,000min: $500,000 · typical: $500,000 · max: $500,000 | — | $500,000min: $500,000 · typical: $500,000 · max: $500,000 | $315,789min: $315,789 · typical: $315,789 · max: $315,789 | $315,789min: $315,789 · typical: $315,789 · max: $315,789 |
| DUO | Rotation-dependentRotation • no single fixed minute value | $550,000min: $550,000 · typical: $550,000 · max: $550,000 | $0min: $0 · typical: $0 · max: $0 | $500,000min: $500,000 · typical: $500,000 · max: $500,000 | $50,000min: $50,000 · typical: $50,000 · max: $50,000 | $550,000min: $550,000 · typical: $550,000 · max: $550,000 | $315,789min: $315,789 · typical: $315,789 · max: $315,789 | $347,368min: $347,368 · typical: $347,368 · max: $347,368 |
| TRIO | Rotation-dependentRotation • no single fixed minute value | $600,000min: $600,000 · typical: $600,000 · max: $600,000 | $0min: $0 · typical: $0 · max: $0 | $500,000min: $500,000 · typical: $500,000 · max: $500,000 | $50,000min: $50,000 · typical: $50,000 · max: $50,000 | $600,000min: $600,000 · typical: $600,000 · max: $600,000 | $315,789min: $315,789 · typical: $315,789 · max: $315,789 | $378,947min: $378,947 · typical: $378,947 · max: $378,947 |
| QUATRO | Rotation-dependentRotation • no single fixed minute value | $650,000min: $650,000 · typical: $650,000 · max: $650,000 | $0min: $0 · typical: $0 · max: $0 | $500,000min: $500,000 · typical: $500,000 · max: $500,000 | $50,000min: $50,000 · typical: $50,000 · max: $50,000 | $650,000min: $650,000 · typical: $650,000 · max: $650,000 | $315,789min: $315,789 · typical: $315,789 · max: $315,789 | $410,526min: $410,526 · typical: $410,526 · max: $410,526 |
08
Key facts
VIDEO
Video walkthrough
Verified video · EN
GTA Online McKenzie Hangar & OSCAR GUZMAN HEIST SOLO Money Guide - Step-By-Step Guide & Setup Tips
Complete Oscar Guzman cycle.
- Channel
- TGG
- Published
- 5 Mar 2025
- Checked
- 29 Aug 2026