Contract • Solo / Duo / Trio / Quatro
The McTony Robbery
Use a submersible and sonar to locate the private Kosatka, seize its bridge, beach the vessel and drive out in the target car.
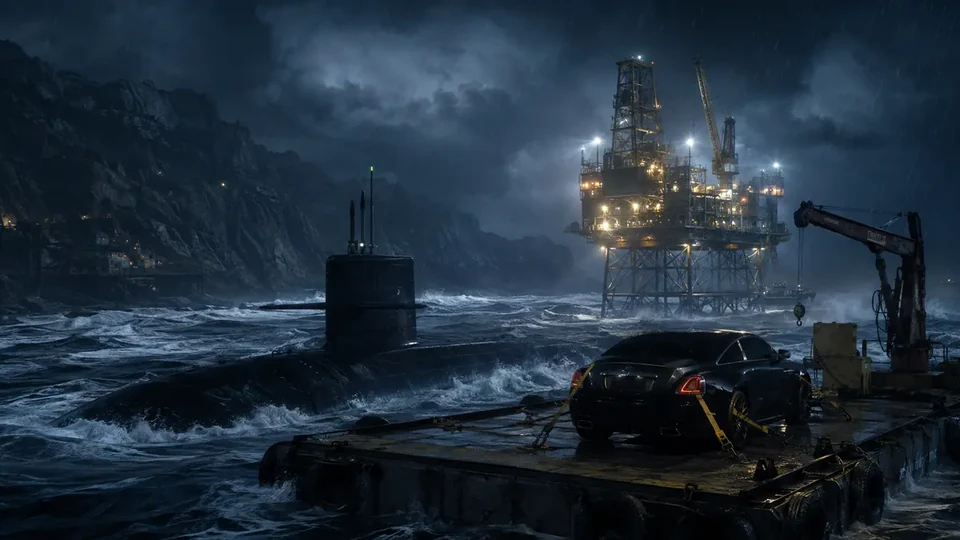 MCTONY / ROBBERY
01
Complete financial model
Partner: a flat $50,000 per finale, included in calculations. Optional challenges: up to $50,000 separately (up to $100,000 total). Community reports, confidence C; organization salary is not part of the finale.
7 days • limit: 3 / reset • shared poolA shared limit of three Salvage Yard robberies per rotation; reset every 7 days.
Verified permanent rules
Salvage Yard board rule
- Partner: a flat $50,000 per finale, included in calculations. Optional challenges: up to $50,000 separately (up to $100,000 total). Community reports, confidence C; organization salary is not part of the finale.
- The board selects three of the five robbery types and three target cars for the weekly rotation.
- The shared limit is three cars; each of the three can be completed only once in that rotation.
- There is no permanent first-weekly bonus and no guarantee that an unfinished robbery survives the reset.
- A finale participant receives a community-reported flat $50,000 regardless of the car; completing every Elite Challenge can add an optional $50,000, up to $100,000 total (confidence C). The calculator does not treat this amount as a percentage of target value.
Partner: a flat $50,000 per finale, included in calculations. Optional challenges: up to $50,000 separately (up to $100,000 total). Community reports, confidence C; organization salary is not part of the finale.
02
Complete step-by-step operation
OPERATIONS GUIDE V2 • SOLO
Use a submersible and sonar to locate the private Kosatka, seize its bridge, beach the vessel and drive out in the target car.
Start here
- Buy a Salvage Yard through Maze Bank Foreclosures and complete its setup with Yusuf and Jamal.
Select “The McTony Robbery — complete flow” from the wall board when the robbery is in the current offering.
The planning room inside your Salvage Yard.
The robbery board: Scope Out, Planning Work, Tasks and finale.
- The Tow Truck, staff and upgrades unrelated to the robbery board are not required for the finale.
First run and replay
These are two persistent story instructions. They are not the finance calculator's weekly-variant switch.
First story playthrough
The first “The McTony Robbery — complete flow” run includes Scope Out, its listed Planning Work, Tasks and the vehicle-recovery finale.
Story replay
Select the robbery again only when it returns to the board under the existing availability rule; this guide does not copy payout or reset figures from the finance model.
Official mission order
- 01
prep / preparation Scope Out: Submarine
Scope the private Kosatka, sonar and vehicle platform.
- 02
prep / preparation Planning Work: Tony's Submersible
Steal the Avisa used to enter through the moon pool.
- 03
prep / preparation Planning Work: Sonar Equipment
Acquire sonar equipment that bypasses the submarine jamming.
- 04
prep / preparationoptional Planning Work: Disrupt Weapons
Destroy the weapon shipments to weaken the crew.
- 05
prep / preparation Task: Security Outfits
Acquire security outfits that provide the initial cover.
- 06
prep / preparation Task: Cutting Torch
Acquire the cutting torch for the engine-room door.
- 07
prep / preparationoptional Task: Masks
Acquire masks for the exposed part of the operation.
- 08
finale The McTony Robbery
Enter in the Avisa, disable navigation, take the bridge, beach the Kosatka and deliver the car.
Strategies that genuinely change the route
Avisa to Kosatka, target car to shore
- When
- After preparing the Avisa, sonar, outfits and cutting torch.
- Plan
- Locate the private Kosatka, enter through the moon pool, destroy four navigation components, obtain bridge codes, beach the submarine and drive the target car from the platform.
- Trade-off
- The disguise limits the first encounters but loses value after sabotage; the shared route to the bridge matters afterward.
Plan for the selected team: SOLO
Selected in the calculator • SOLO for “The McTony Robbery — complete flow”: SOLO operator: Avisa pilot and sonar operator + Engine-room saboteur + Security-head hunter + Captain and car driver.
Concrete roles
Leads from Paleto Cove to the moon pool and maintains target contact. Cuts the door and destroys four navigation-system components. Finds the target, searches the body and provides bridge codes. Beaches the Kosatka, activates the platform and delivers the target car.
Actions, risk and run recovery
- 01
prep / preparationScope Out: Submarine - Action
- At Elysian Island, photograph the sonar jammer, Kosatka schematics and landing pad that will become the vehicle exit.
- Tip
- In Scope Out photograph the sonar jammer, Kosatka plans and landing pad.
- Risk / failure condition
- A missed point hides entry, navigation or the target-car exit.
- How to recover the run
- Return to the missing marker, capture the full view and wait for Jamal.
- 02
prep / preparationTony's Submersible - Action
- Clear the guarded dock, use the crane switch, lower the Avisa into the water and deliver it to the finale staging crew.
- Tip
- Clear the dock, use the crane switch and lower the Avisa without striking the pier.
- Risk / failure condition
- A destroyed submersible removes the finale's moon-pool entry.
- How to recover the run
- Pause the lowering, clear the area, stabilize the crane and retry vertically.
- 03
prep / preparationSonar Equipment - Action
- Break into the warehouse, pry open the crates, find the sonar that bypasses jamming and deliver it to the Salvage Yard.
- Tip
- Pry open crates until the correct sonar is found and deliver it without abandoning it.
- Risk / failure condition
- Leaving without the device prevents locating the private Kosatka.
- How to recover the run
- Return to the final unopened crate, recover sonar and confirm delivery.
- 04
prep / preparationRemaining tasks - Action
- Acquire security outfits and a cutting torch; optionally destroy the weapon shipments to weaken the submarine crew.
- Tip
- Confirm security outfits and the cutting torch; treat weapon disruption as optional support.
- Risk / failure condition
- Missing outfits or torch blocks the safe entry or engine room.
- How to recover the run
- Return to the board, finish the mandatory Task and do not substitute optional disruption.
- 05
finaleAvisa at Paleto Cove - Action
- In the finale, collect the submersible at Paleto Cove, head out to sea and activate sonar inside the search area.
- Tip
- At Paleto Cove board the full crew in the Avisa and activate sonar only in the search area.
- Risk / failure condition
- Diving early outside signal splits the crew and loses the submarine point.
- How to recover the run
- Surface, collect the final player and re-enter the area on a stable heading.
- 06
finaleMoon pool - Action
- Locate the private Kosatka, dive and dock the Avisa in its moon pool; the disguise initially lets you pass some crew members.
- Tip
- Locate the Kosatka, approach from below and dock the Avisa straight into the moon pool.
- Risk / failure condition
- A poor approach under fire can damage the Avisa before docking.
- How to recover the run
- Drop deeper, align with the submarine axis and retry without sharp turns.
- 07
finaleEngine room - Action
- Reach the engine room, cut through the sealed door and destroy all four navigation-system components.
- Tip
- In the engine room cut the door and circle one way while counting four components.
- Risk / failure condition
- A missed navigation component blocks bridge takeover and beaching the submarine.
- How to recover the run
- Do not advance; return through the cut door, find the active marker and confirm the fourth target.
- 08
finaleHead of security - Action
- Locate the head of security, eliminate him and search the body for the bridge control codes.
- Tip
- After removing the head of security always search the body and call the bridge codes.
- Risk / failure condition
- Reaching the bridge without codes stalls takeover under crew waves.
- How to recover the run
- Return to the target's last position, search it and move back to the bridge as a group.
- 09
finaleTake the bridge - Action
- Reach the bridge, enter the codes, take control of the Kosatka and drive it onto the beach.
- Tip
- On the bridge the operator enters the codes and drives the Kosatka straight onto the marked beach.
- Risk / failure condition
- A poor heading will not place the landing pad ashore and extends fighting inside.
- How to recover the run
- Correct with a wide turn, align the bow with the marker and retry beaching.
- 10
finaleLanding pad and delivery - Action
- Activate the vehicle platform, enter the target car, drive out of the submarine, lose the police and deliver it to the Salvage Yard.
- Tip
- Activate the landing pad, enter the target car and leave only after the platform fully opens.
- Risk / failure condition
- Accelerating early can trap or damage the car on the moving platform.
- How to recover the run
- Hold the vehicle, wait for the mechanism to finish and drive straight onto the delivery route.
Common mistakes
Incomplete underwater package
- Consequence
- A missing element stops locating the submarine, entry, engine-room access or sealed doors.
- Correction
- Return to the Salvage Yard board and complete the exact Task before collecting the Avisa again.
Missed navigation component
- Consequence
- Incomplete sabotage blocks bridge takeover and beaching the Kosatka.
- Correction
- Do not advance; return through the cut door, remove the final marker and search for security only after the fourth confirmation.
Codes not carried to the bridge
- Consequence
- Reaching the bridge without codes stalls takeover under crew fire.
- Correction
- Send cover back to the target's last position, search the body, regroup and return to the bridge on one route.
Pre-launch checklist
Avisa, sonar, outfits and cutting torch are confirmed before the finale.
The crew knows the checkpoints: four navigation components, security-head codes, vehicle platform.
Avisa, sonar, security outfits and cutting torch must be ready before leaving for Paleto Cove.
The saboteur circles the engine room in one direction and counts four destroyed components before leaving.
After eliminating the head of security, the operator always searches the body and calls code acquisition.
03
Expanded informational overview
Guide scopeThis section organizes the complete cycle: requirements, phases, figures and dependencies. The detailed operation flow is in the walkthrough above.
The weekly board provides three robberies in total. Each has its own value and preparation scope, but all share the same rotation limit.
04
How the full cycle works
This section complements the walkthrough with full-cycle dependencies: unlock, preparations, finale, settlement and the next available attempt.
Unlock
Requirement: Salvage Yard.
Contract selection
Availability may depend on a board, phone call or activity rotation.
Preparation
The model includes required stages before the final settlement.
Completion
Team choice affects pace, host payout and each partner's payout.
Replay or rotation
A shared limit of three Salvage Yard robberies per rotation; reset every 7 days.
05
What affects the result
Payout and time cover the complete cycle, not only its final job.
The host and every participant have separately defined payouts; the team average does not replace those values.
Setup fees and commissions are deducted before the net result.
Fast/typical/beginner: 45 min / 1 hr / 1 hr 30 min.
Main strengths
- Lower entry cost than major heists.
- Flexible supported team size.
Constraints
- Some contracts depend on board rotation.
- A partner may receive a different payout from the host.
06
Solo / Duo / Trio / Quatro variants
Every supported team size shows its host, partner and team model. Provisional rates are clearly labelled, and incomplete data is explained alongside the result.
Solo: full pace control and no crew wait.
- Host / owner
- $335,000
- Team net
- $335,000
- Weekly reset
- 7 dayslimit: 3 / reset • shared pool
Duo: the host and 1 partner have separate payouts.
- Host / owner
- $335,000
- Each partner
- $50,000Partner: a flat $50,000 per finale, included in calculations. Optional challenges: up to $50,000 separately (up to $100,000 total). Community reports, confidence C; organization salary is not part of the finale.
- Team net
- $385,000
- Weekly reset
- 7 dayslimit: 3 / reset • shared pool
Trio: the host and 2 partners have separate payouts.
- Host / owner
- $335,000
- Each partner
- $50,000Partner: a flat $50,000 per finale, included in calculations. Optional challenges: up to $50,000 separately (up to $100,000 total). Community reports, confidence C; organization salary is not part of the finale.
- Team net
- $435,000
- Weekly reset
- 7 dayslimit: 3 / reset • shared pool
Quatro: the host and 3 partners have separate payouts.
- Host / owner
- $335,000
- Each partner
- $50,000Partner: a flat $50,000 per finale, included in calculations. Optional challenges: up to $50,000 separately (up to $100,000 total). Community reports, confidence C; organization salary is not part of the finale.
- Team net
- $485,000
- Weekly reset
- 7 dayslimit: 3 / reset • shared pool
07
Complete figures by team
Typical values for the selected cycle; every cell also contains a min–max range.
| Team | Cooldown | Team gross | Costs + fees | Host / owner | Each partner | Team net | Host / owner $/h | Team $/h |
|---|---|---|---|---|---|---|---|---|
| SOLO | 7 daysWeekly reset • limit: 3 / reset • shared pool | $335,000min: $250,000 · typical: $335,000 · max: $420,000 | $0min: $0 · typical: $0 · max: $0 | $335,000min: $250,000 · typical: $335,000 · max: $420,000 | — | $335,000min: $250,000 · typical: $335,000 · max: $420,000 | — | — |
| DUO | 7 daysWeekly reset • limit: 3 / reset • shared pool | $385,000min: $300,000 · typical: $385,000 · max: $470,000 | $0min: $0 · typical: $0 · max: $0 | $335,000min: $250,000 · typical: $335,000 · max: $420,000 | $50,000min: $50,000 · typical: $50,000 · max: $50,000 | $385,000min: $300,000 · typical: $385,000 · max: $470,000 | — | — |
| TRIO | 7 daysWeekly reset • limit: 3 / reset • shared pool | $435,000min: $350,000 · typical: $435,000 · max: $520,000 | $0min: $0 · typical: $0 · max: $0 | $335,000min: $250,000 · typical: $335,000 · max: $420,000 | $50,000min: $50,000 · typical: $50,000 · max: $50,000 | $435,000min: $350,000 · typical: $435,000 · max: $520,000 | — | — |
| QUATRO | 7 daysWeekly reset • limit: 3 / reset • shared pool | $485,000min: $400,000 · typical: $485,000 · max: $570,000 | $0min: $0 · typical: $0 · max: $0 | $335,000min: $250,000 · typical: $335,000 · max: $420,000 | $50,000min: $50,000 · typical: $50,000 · max: $50,000 | $485,000min: $400,000 · typical: $485,000 · max: $570,000 | — | — |
08
Key facts
VIDEO
Video walkthrough
Verified video · EN
GTA Online: The McTONY ROBBERY GUIDE! All Setups and Objectives!
All setups, finale and objectives.
- Channel
- Tylarious
- Published
- 29 Dec 2023
- Checked
- 29 Aug 2026