Contract • Solo / Duo / Trio / Quatro
The Lost Contract
Identify four labs and the transport method, destroy the Lost MC facilities, take the tanker and deliver it to Chef.
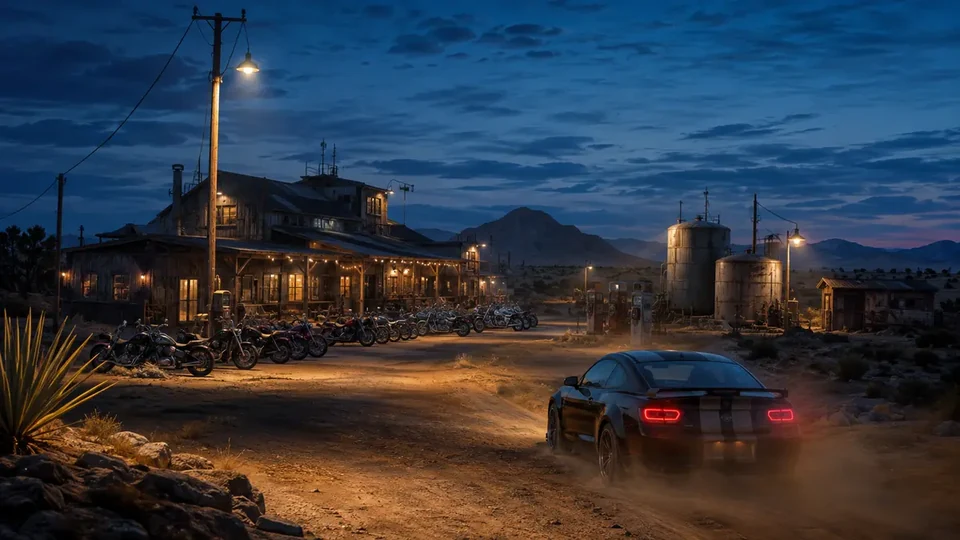 LOST / CONTRACT
01
Complete financial model
Rotation-dependent • no single fixed minute valueThere is no single confirmed minute value; availability depends on a board, phone call or contract rotation.
host and every partner have a separately defined payout
02
Complete step-by-step operation
OPERATIONS GUIDE V2 • SOLO
Identify four labs and the transport method, destroy the Lost MC facilities, take the tanker and deliver it to Chef.
Start here
- Buy an Auto Shop through Maze Bank Foreclosures and complete its setup mission.
Use the upstairs Job Board and select “The Lost Contract — complete flow” when the contract is available.
The upper floor of your Auto Shop.
Sessanta and KDJ's Job Board: two Planning Works and the Final Job.
- A second lift, staff, personal quarters and cosmetic Auto Shop upgrades are not required for contracts.
First run and replay
These are two persistent story instructions. They are not the finance calculator's weekly-variant switch.
First story playthrough
On the first “The Lost Contract — complete flow” selection, complete both Planning Works shown on the Job Board before launching the Final Job.
Story replay
After completion, wait for the contract to return to the rotating Job Board; every new attempt requires its two Planning Works.
Official mission order
- 01
prep / preparation Planning Work: Lab Locations
Identify the four Lost MC laboratories.
- 02
prep / preparation Planning Work: Transport Method
Prepare the method used to seize the tanker at Stab City.
- 03
finale The Job
Destroy all four labs, seize the tanker and deliver it to Chef.
Strategies that genuinely change the route
Four labs, then the tanker
- When
- After obtaining the lab list, explosives and chosen tractor.
- Plan
- Set a four-lab loop, destroy each without stopping for bikers, then take the tractor and free the tanker at Stab City.
- Trade-off
- The Phantom Wedge simplifies the Slamvan blockade; a standard tractor requires moving the obstruction manually.
Plan for the selected team: SOLO
Selected in the calculator • SOLO for “The Lost Contract — complete flow”: SOLO operator: Lab-route navigator + Control-panel bomber + Biker cover + Tanker driver.
Concrete roles
Sets the four-site order and leads without backtracking. Enters labs, plants charges and exits immediately. Keeps the road open between sites without stopping the convoy. Takes the tractor, clears the Slamvan block and delivers the trailer to Chef.
Actions, risk and run recovery
- 01
prep / preparationLab Locations - Action
- Gain entry to the Lost MC clubhouse, obtain the lab list and collect the explosives used on their production controls.
- Tip
- In Lab Locations photograph every required lab and confirm the full set of sites.
- Risk / failure condition
- A missed location will not appear as a finale detonation target.
- How to recover the run
- Return to the missing camp, take a clear photograph and wait for confirmation.
- 02
prep / preparationTransport Method - Action
- Identify how the final shipment will move and choose a tractor; the Phantom Wedge makes clearing the tanker blockade easier in the finale.
- Tip
- In Transport Method secure the tractor and route to the tanker without destroying it.
- Risk / failure condition
- A destroyed tractor removes the finale's tanker transport.
- How to recover the run
- Draw bikers away from the vehicle, clear the exit and deliver it without further combat.
- 03
finaleFirst lab - Action
- Reach the first site, clear the Lost MC outside and inside, plant the bomb on the control panel and exit immediately.
- Tip
- At the first lab place charges on every marked installation before detonating.
- Risk / failure condition
- Detonating early leaves an objective active and forces a return under pursuit.
- How to recover the run
- Check marker count, place the missing charge and only then detonate.
- 04
finaleFour-site rotation - Action
- Repeat the process at El Burro Heights, East Vinewood, Grand Senora Desert and Redwood Lights Track in your chosen order.
- Tip
- Run the four sites in one loop and finish each before moving to the next.
- Risk / failure condition
- Splitting the crew across labs activates multiple pursuits without shared cover.
- How to recover the run
- Abort the second approach, regroup at the active lab and finish it together.
- 05
finaleBiker pursuit - Action
- After the first explosion, expect armed bikers on motorcycles and avoid unnecessary stops between labs.
- Tip
- After each detonation the driver immediately collects the crew while gunners remove only blocking bikes.
- Risk / failure condition
- Chasing one biker extends travel and splits the crew.
- How to recover the run
- Return to the vehicle, select the next site and keep moving instead of fighting.
- 06
finaleFinal detonation - Action
- After planting the fourth charge, wait for confirmation that every lab has been destroyed.
- Tip
- Detonate the final lab only after staging the retreat toward the tractor unit.
- Risk / failure condition
- Detonating without transport leaves the crew on foot under full Lost pursuit.
- How to recover the run
- Hold in a cleared area, bring the vehicle and only then finish the sabotage.
- 07
finaleCollect the tractor - Action
- Go to Harmony Truck Stop and take the prepared Phantom Wedge or standard tractor.
- Tip
- Take the tractor unit and line it up directly with the tanker at Stab City.
- Risk / failure condition
- A poor coupling angle under fire blocks the heavy rig's exit.
- How to recover the run
- Clear the yard, straighten the tractor and retry coupling without sharp turns.
- 08
finaleTanker at Stab City - Action
- Clear the area, move the Lost Slamvan blocking the trailer—with the wedge or manually—and hook up the shipment tanker.
- Tip
- At Stab City cover opens the gate and destroys blocking vehicles, not the tanker.
- Risk / failure condition
- Gunfire around the tanker can destroy the contract's final cargo.
- How to recover the run
- Reverse the rig into cover, shift fire to bikes and clear one exit lane.
- 09
finaleDeliver to Chef - Action
- Lose the pursuing bikers and deliver the tanker intact to Chef's drop-off near Route 68 or Grapeseed.
- Tip
- Drive a steady route to Chef while the escort vehicle stays behind the tanker through delivery.
- Risk / failure condition
- The unescorted tanker is slow and easily blocked by pursuing Lost.
- How to recover the run
- Hold on a straight stretch, wait for the escort and resume as a convoy.
Common mistakes
Chaotic lab order
- Consequence
- Backtracking extends biker pursuit and wears down the vehicle before Stab City.
- Correction
- Rather than backtracking to a distant site, close the nearest unfinished point and recalculate the remaining loop.
Lingering after planting
- Consequence
- The blast and incoming Lost can trap the player inside and destroy transport.
- Correction
- Do not fight at the panel; take the nearest exit, board the cover vehicle and shake the closest bikers while moving.
Tanker blocked by the Slamvan
- Consequence
- Trying to couple through the block damages the tractor and leaves the tanker under fire in Stab City.
- Correction
- Disengage, clear both sides, remove the Slamvan using the chosen method and reverse straight onto the hitch.
Pre-launch checklist
The four labs have a set order and the bomber has an exit vehicle ready.
The crew knows whether the Phantom Wedge or a manually moved Slamvan clears the tanker.
Before the first bomb, set a loop through El Burro, East Vinewood, Grand Senora and Redwood from the start position.
The bomber exits immediately after interaction while cover waits in a vehicle facing the next site.
The Phantom Wedge pushes the block; with a standard tractor, move the Slamvan manually first.
03
Expanded informational overview
Guide scopeThis section organizes the complete cycle: requirements, phases, figures and dependencies. The detailed operation flow is in the walkthrough above.
04
How the full cycle works
This section complements the walkthrough with full-cycle dependencies: unlock, preparations, finale, settlement and the next available attempt.
Unlock
Requirement: Auto Shop.
Contract selection
Availability may depend on a board, phone call or activity rotation.
Preparation
The model includes required stages before the final settlement.
Completion
Team choice affects pace, host payout and each partner's payout.
Replay or rotation
There is no single confirmed minute value; availability depends on a board, phone call or contract rotation.
05
What affects the result
Payout and time cover the complete cycle, not only its final job.
The host and every participant have separately defined payouts; the team average does not replace those values.
Setup fees and commissions are deducted before the net result.
Fast/typical/beginner: 30 min / 45 min / 1 hr 12 min.
Main strengths
- Lower entry cost than major heists.
- Flexible supported team size.
Constraints
- Some contracts depend on board rotation.
- A partner may receive a different payout from the host.
06
Solo / Duo / Trio / Quatro variants
Every supported team size shows its host, partner and team model. Provisional rates are clearly labelled, and incomplete data is explained alongside the result.
Solo: full pace control and no crew wait.
- Host / owner
- $162,000
- Team net
- $162,000
- Rotation
- Rotation-dependentno single fixed minute value
Duo: the host and 1 partner have separate payouts.
- Host / owner
- $162,000
- Each partner
- $50,000
- Team net
- $212,000
- Rotation
- Rotation-dependentno single fixed minute value
Trio: the host and 2 partners have separate payouts.
- Host / owner
- $162,000
- Each partner
- $50,000
- Team net
- $262,000
- Rotation
- Rotation-dependentno single fixed minute value
Quatro: the host and 3 partners have separate payouts.
- Host / owner
- $162,000
- Each partner
- $50,000
- Team net
- $312,000
- Rotation
- Rotation-dependentno single fixed minute value
07
Complete figures by team
Typical values for the selected cycle; every cell also contains a min–max range.
| Team | Cooldown | Team gross | Costs + fees | Host / owner | Each partner | Team net | Host / owner $/h | Team $/h |
|---|---|---|---|---|---|---|---|---|
| SOLO | Rotation-dependentRotation • no single fixed minute value | $162,000min: $162,000 · typical: $162,000 · max: $162,000 | $0min: $0 · typical: $0 · max: $0 | $162,000min: $162,000 · typical: $162,000 · max: $162,000 | — | $162,000min: $162,000 · typical: $162,000 · max: $162,000 | $216,000min: $216,000 · typical: $216,000 · max: $216,000 | $216,000min: $216,000 · typical: $216,000 · max: $216,000 |
| DUO | Rotation-dependentRotation • no single fixed minute value | $212,000min: $212,000 · typical: $212,000 · max: $212,000 | $0min: $0 · typical: $0 · max: $0 | $162,000min: $162,000 · typical: $162,000 · max: $162,000 | $50,000min: $50,000 · typical: $50,000 · max: $50,000 | $212,000min: $212,000 · typical: $212,000 · max: $212,000 | $216,000min: $216,000 · typical: $216,000 · max: $216,000 | $282,667min: $282,667 · typical: $282,667 · max: $282,667 |
| TRIO | Rotation-dependentRotation • no single fixed minute value | $262,000min: $262,000 · typical: $262,000 · max: $262,000 | $0min: $0 · typical: $0 · max: $0 | $162,000min: $162,000 · typical: $162,000 · max: $162,000 | $50,000min: $50,000 · typical: $50,000 · max: $50,000 | $262,000min: $262,000 · typical: $262,000 · max: $262,000 | $216,000min: $216,000 · typical: $216,000 · max: $216,000 | $349,333min: $349,333 · typical: $349,333 · max: $349,333 |
| QUATRO | Rotation-dependentRotation • no single fixed minute value | $312,000min: $312,000 · typical: $312,000 · max: $312,000 | $0min: $0 · typical: $0 · max: $0 | $162,000min: $162,000 · typical: $162,000 · max: $162,000 | $50,000min: $50,000 · typical: $50,000 · max: $50,000 | $312,000min: $312,000 · typical: $312,000 · max: $312,000 | $216,000min: $216,000 · typical: $216,000 · max: $216,000 | $416,000min: $416,000 · typical: $416,000 · max: $416,000 |
08
Key facts
VIDEO
Video walkthrough
Verified video · EN
GTA Online: The Lost Contract SOLO Walkthrough + Unlock Lost Outfits
All planning work and finale.
- Channel
- Mr. Buddenz
- Published
- 23 May 2026
- Checked
- 29 Aug 2026