Heist • Solo / Co-op
The Kortz Center Heist
Plan the operation from the Art Studio, scope the museum, replace the primary painting with a forgery and remove the evidence before delivery.
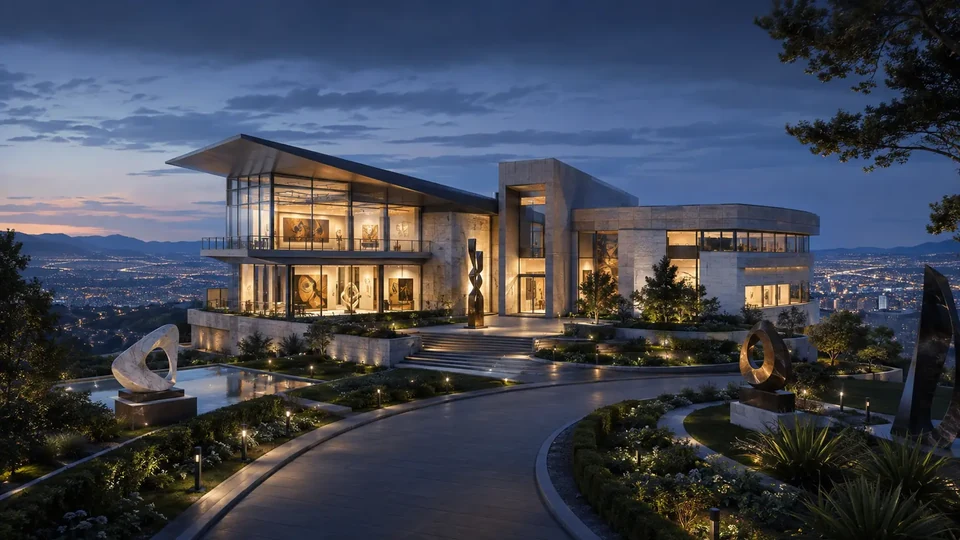 KORTZ / CENTER
01
Complete financial model
Settlement for the selected painting. The catalog covers 27 names stored in the data but does not promise their current rotation. La Dernière Débauche is the first story target on Normal; The Outcome of Endeavour is historical/special. Secondary loot and optional bonuses are not included.
Helper: $100,000 on Normal / $200,000 on Hard; optional bonuses excluded.
48 minGroup heists have a 48 min wait after the finale.
Verified permanent rules
Reset and painting sale
- Community model B/C: defaults to Hard, painting sale, no secondary loot or bonuses. Primary is host-only; secondary is shared equally and partners have a separate base. The typical painting value is an editorial benchmark, not a random-pool average.
- Finale partner: $100,000 Normal / $200,000 Hard base + total crew secondary ÷ players + earned bonuses. Host: painting sale value (Keep = $0) + the same secondary share and bonuses, minus their setup.
- Buyer Request and Elite: each $50,000 Normal / $100,000 Hard. Elite requires complete Buyer Request. An unused prepared vehicle adds $10,000 for Annihilator Stealth/armoured Caracara, or $2,500 per Manchez. Bonuses are optional; one-time awards and organization salary are excluded.
- Primary Normal: $304,500–481,250; Hard: $334,950–529,375. The first weekly sale multiplies primary alone by ×4, not the partner base, secondary or bonuses. Hard is not multiplied by ×1.1 again.
- The first Primary Target sold after the reset consumes the reset rate; scope-out and starting setup do not consume it.
- The first story painting must be sold; later eligible paintings can be sold or displayed.
- Displaying a painting is not a sale. The first setup after the reset is free and each later setup costs $100,000.
- The current painting rotation is not part of the permanent guide.
02
Complete step-by-step operation
OPERATIONS GUIDE V2 • SOLO
Plan the operation from the Art Studio, scope the museum, replace the primary painting with a forgery and remove the evidence before delivery.
Start here
- Buy a Mansion with the Art Studio expansion and complete the introductory meeting with Mr. Faber and Raf.
Use the board in the Art Studio and launch the Kortz Center scope-out.
The host's Mansion Art Studio.
The Art Studio operation board.
- Other Mansion expansions are not required to launch the heist.
First run and replay
These are two persistent story instructions. They are not the finance calculator's weekly-variant switch.
First story playthrough
The first run includes Art Studio setup, a full Kortz Center scope, discovery of entrances and security, forgery preparation and the complete equipment list.
Story replay
On replay, return to the Art Studio board, reconfirm the current painting and available art, then prepare the selected entrance, equipment and vehicle for the new finale.
Official mission order
- 01
unlockfirst run only Art Studio setup
Complete Mr. Faber and Raf's introduction to activate the operation board.
- 02
prep / preparation Scope Out: Kortz Center
Scope the primary painting, secondary art, entrances and museum security.
- 03
prep / preparation Infiltration Gear
Acquire the equipment required by the selected entry route.
- 04
prep / preparation Unmarked Weapons
Prepare an unmarked weapon loadout for the finale.
- 05
prep / preparation Getaway Vehicle
Acquire and prepare the selected museum getaway vehicle.
- 06
prep / preparation Equipment: Access Code
Obtain the code for the secured area of the Kortz Center.
- 07
prep / preparation Equipment: Hacking Device
Acquire the device needed at the CCTV server and vault.
- 08
prep / preparationoptional Guard Routes
Acquire the patrol route displayed during infiltration.
- 09
prep / preparationoptional Guard Shipments
Disrupt the security shipments to weaken their equipment.
- 10
prep / preparationoptional Glass Cutter
Prepare the tool used to open secondary-art display cases.
- 11
prep / preparationoptional Power Drills
Acquire drills for the optional lockboxes.
- 12
prep / preparationoptional EMP Charges
Prepare charges that provide extra control over the museum systems.
- 13
finale The Kortz Center Heist
Replace the painting with the forgery, erase the CCTV record and deliver the original.
Strategies that genuinely change the route
Undetected museum route
- When
- When scope-out found the prepared entrance and the crew knows camera and beam timing.
- Plan
- Pass the CCTV server, code and laser boxes before substituting the painting; take secondary art only from scoped positions.
- Trade-off
- The clean route protects the painting on exit but requires patience at every security system.
Controlled alarm recovery
- When
- When the alarm starts after entry and a safe return to stealth is no longer possible.
- Plan
- Clear one room at a time, protect the painting carrier and still wipe the recording before leaving.
- Trade-off
- The slower push protects the objective but increases security pressure on the way to the vehicle.
Plan for the selected team: SOLO
Selected in the calculator • SOLO for “The Kortz Center Heist — complete flow”: SOLO operator: Infiltration lead + CCTV and code operator + Vault operator + Secondary art and exit.
Concrete roles
Selects the scoped entrance and leads the crew between cameras to the server room. Handles the fingerprint clone, CCTV computer and acquired security-door code. Tracks the thermal limit, substitutes the primary painting and packs the original. Collects only scoped art, wipes the recording and leads the move to the prepared vehicle.
Actions, risk and run recovery
- 01
unlockArt Studio - Action
- The host needs a Mansion with the Art Studio expansion. After meeting Mr. Faber and Raf, the studio board activates the target, forgery and preparation list.
- Tip
- Finish the Art Studio setup and inspect Raf's board before scope-out.
- Risk / failure condition
- An incomplete introduction will not unlock the full preparation list.
- How to recover the run
- Return to the Art Studio, finish the introduction and refresh the board.
- 02
prep / preparationMuseum scope-out - Action
- Enter the Kortz Center without raising suspicion, access its camera network and photograph the primary painting, secondary art and relevant security features.
- Tip
- Photograph the target, security systems and available secondary art without raising suspicion.
- Risk / failure condition
- Incomplete scope-out hides entrances, artwork and equipment options needed later.
- How to recover the run
- Return to the Kortz Center and capture only the missing scope points.
- 03
prep / preparationEntrances and routes - Action
- Discover the staff entrance, skylight, loading bay and sewer. Points found during the scope determine which entry and exit routes are available in the finale.
- Tip
- Choose one scoped entry-and-escape pair before assigning roles.
- Risk / failure condition
- An entry without a matching escape leaves the painting crew on the wrong side of security.
- How to recover the run
- Revise the board selection and pair the entry with an actually scoped delivery route.
- 04
prep / preparationRequired equipment - Action
- Complete one selected Infiltration Gear, Unmarked Weapons and Getaway Vehicle mission, plus both Equipment jobs: Access Code and Hacking Device.
- Tip
- Complete the infiltration gear, weapons and vehicle assigned to the selected entry.
- Risk / failure condition
- A missing code, device or vehicle stops the corresponding finale gate.
- How to recover the run
- Return to the Equipment row identified by the board and finish the missing item.
- 05
prep / preparationOptional preparations - Action
- Guard Routes reveals security, Guard Shipments weakens it, the Glass Cutter opens display cases, Power Drills open lockboxes and EMP Charges provide additional control over museum systems.
- Tip
- Choose optional aids for the route's real weakness, not for completion percentage.
- Risk / failure condition
- Skipping relevant support can shorten the target window or make an alarmed escape harder.
- How to recover the run
- Before the finale, add only the aid that supports the chosen entry, loot or retreat.
- 06
finaleInfiltration - Action
- In the finale, select only an entrance, weapon set and vehicle that were prepared. Reach the basement through the exhibits while avoiding camera and guard vision if maintaining stealth.
- Tip
- The lead holds the crew before each camera and opens the next sector only on a clear call.
- Risk / failure condition
- A solo move through a camera cone activates security before the painting swap.
- How to recover the run
- Fall back to the last unseen recess; after an alarm, regroup and switch to controlled clearing.
- 07
finaleCCTV server - Action
- Complete the fingerprint-cloner hack at the server-room door, enter and use the computer to suppress surveillance before moving into the secured section.
- Tip
- The CCTV operator uses the computer while cover holds the server-room entrances.
- Risk / failure condition
- An interrupted computer leaves cameras active on the remaining route.
- How to recover the run
- Secure the doors, finish the same interaction and leave the server room only afterward.
- 08
finaleAccess code and lasers - Action
- Enter the acquired code at the security-door terminal, then watch the beam patterns and use the successive power boxes to cross the laser grid safely.
- Tip
- One player handles the code while another calls the laser rhythm and box order.
- Risk / failure condition
- A mistimed move through the beams triggers the alarm immediately before the vault.
- How to recover the run
- Return to the safe edge, watch one full cycle and retry one player at a time.
- 09
finaleVault and substitution - Action
- Hack the vault keypad, enter before the thermal limit expires and replace the primary painting with the prepared forgery, packing the original into its container.
- Tip
- Track the device limit, swap in the forgery and pack the original before secondary loot.
- Risk / failure condition
- An interrupted swap or exceeded limit prevents securing the primary painting.
- How to recover the run
- Drop secondary interactions, return the operator to the mechanism and finish the primary swap.
- 10
finaleSecondary artwork - Action
- Collect only scoped targets that fit the crew's bags; use the Glass Cutter on display cases and Power Drills on lockboxes if those preparations were completed.
- Tip
- Collect only scoped artwork assigned to named players.
- Risk / failure condition
- Unplanned searching splits the crew and exposes the primary-target carrier.
- How to recover the run
- Stop searching and return to the assigned artwork or the exit regroup point.
- 11
finaleEvidence and delivery - Action
- Unlock the security doors, wipe the vault footage and leave the Kortz Center through a scoped route. Reach the getaway vehicle and deliver the primary painting to the Cypress Flats lockup.
- Tip
- Wipe the footage, protect the painting and take the shortest prepared route to the lockup.
- Risk / failure condition
- Skipped footage or losing the shared vehicle increases pressure during delivery.
- How to recover the run
- Send the operator back to the terminal, then regroup at the vehicle and resume on one route.
Common mistakes
Incomplete museum scope
- Consequence
- A missing code, Hacking Device or matching entrance stops the route before the vault.
- Correction
- Return to the Art Studio, complete required Equipment and select only a scoped entrance and vehicle.
Rushing the lasers
- Consequence
- Touching lasers or leaving CCTV active starts the alarm before substitution and complicates extraction.
- Correction
- Return to the last safe recess; after an alarm, regroup and clear sectors instead of running separately.
Leaving evidence behind
- Consequence
- Skipping the recording wipe or overloading on secondary art increases pressure while delivering the primary target.
- Correction
- End unnecessary searching, protect the painting carrier and take the shortest prepared route to Cypress Flats.
Pre-launch checklist
The selected entrance has matching infiltration gear, weapons and vehicle.
CCTV, code, vault and wipe operators know the interaction order.
Photograph entrances, security and actually available art before choosing equipment.
One player watches the beam pattern while another triggers each box only on a clear call.
After packing the painting, wipe the recording before opening the route to the vehicle.
03
Expanded informational overview
Guide scopeThis section organizes the complete cycle: requirements, phases, figures and dependencies. The detailed operation flow is in the walkthrough above.
04
How the full cycle works
This section complements the walkthrough with full-cycle dependencies: unlock, preparations, finale, settlement and the next available attempt.
Unlock
Base requirement: Mansion + Art Studio. Minimum entry cost is kept separate from the setup fee.
Plan configuration
Available approach, target, difficulty and team choices determine later costs and payout distribution.
Preparations
The model's full time includes required preparation; optional items trade extra time for a safer run.
Finale
The result depends on target or pool value, participant count, possible losses and bonus conditions.
Settlement and replay
After deductions, the pool is distributed using the payout model. Group heists have a 48 min wait after the finale.
05
What affects the result
The min–typical–max range accounts for a variable target, loot or difficulty where applicable.
The setup fee is deducted before the net result is calculated.
Player count and NPC crew fees can change the host and each partner's payout.
The model compares 55 min / 1 hr 20 min / 2 hrs 5 min, not the finale alone.
Main strengths
- High payout per completed cycle.
- Clear split between preparation, finale and settlement.
Constraints
- Entry and setup costs reduce the first return.
- The result depends on team size, cuts and cooldown.
06
Solo / Duo / Trio / Quatro variants
Every supported team size shows its host, partner and team model. Provisional rates are clearly labelled, and incomplete data is explained alongside the result.
Solo: full pace control and no crew wait.
- Host / owner
- $235,500
- Team net
- $235,500
- Cooldown
- 48 min
Duo: secondary is shared equally by 2 players; partners have a separate base, while only the host receives the painting and pays setup.
- Host / owner
- $235,500
- Each partner
- $200,000
- Team net
- $435,500
- Cooldown
- 48 min
Trio: secondary is shared equally by 3 players; partners have a separate base, while only the host receives the painting and pays setup.
- Host / owner
- $235,500
- Each partner
- $200,000
- Team net
- $635,500
- Cooldown
- 48 min
Quatro: secondary is shared equally by 4 players; partners have a separate base, while only the host receives the painting and pays setup.
- Host / owner
- $235,500
- Each partner
- $200,000
- Team net
- $835,500
- Cooldown
- 48 min
07
Complete figures by team
Typical values for the selected cycle; every cell also contains a min–max range.
| Team | Cooldown | Team gross | Costs + fees | Host / owner | Each partner | Team net | Host / owner $/h | Team $/h |
|---|---|---|---|---|---|---|---|---|
| SOLO | 48 minCooldown | $335,500min: $335,500 · typical: $335,500 · max: $335,500 | $100,000min: $100,000 · typical: $100,000 · max: $100,000 | $235,500min: $235,500 · typical: $235,500 · max: $235,500 | — | $235,500min: $235,500 · typical: $235,500 · max: $235,500 | $176,625min: $176,625 · typical: $176,625 · max: $176,625 | $176,625min: $176,625 · typical: $176,625 · max: $176,625 |
| DUO | 48 minCooldown | $535,500min: $535,500 · typical: $535,500 · max: $535,500 | $100,000min: $100,000 · typical: $100,000 · max: $100,000 | $235,500min: $235,500 · typical: $235,500 · max: $235,500 | $200,000min: $200,000 · typical: $200,000 · max: $200,000 | $435,500min: $435,500 · typical: $435,500 · max: $435,500 | $176,625min: $176,625 · typical: $176,625 · max: $176,625 | $326,625min: $326,625 · typical: $326,625 · max: $326,625 |
| TRIO | 48 minCooldown | $735,500min: $735,500 · typical: $735,500 · max: $735,500 | $100,000min: $100,000 · typical: $100,000 · max: $100,000 | $235,500min: $235,500 · typical: $235,500 · max: $235,500 | $200,000min: $200,000 · typical: $200,000 · max: $200,000 | $635,500min: $635,500 · typical: $635,500 · max: $635,500 | $176,625min: $176,625 · typical: $176,625 · max: $176,625 | $476,625min: $476,625 · typical: $476,625 · max: $476,625 |
| QUATRO | 48 minCooldown | $935,500min: $935,500 · typical: $935,500 · max: $935,500 | $100,000min: $100,000 · typical: $100,000 · max: $100,000 | $235,500min: $235,500 · typical: $235,500 · max: $235,500 | $200,000min: $200,000 · typical: $200,000 · max: $200,000 | $835,500min: $835,500 · typical: $835,500 · max: $835,500 | $176,625min: $176,625 · typical: $176,625 · max: $176,625 | $626,625min: $626,625 · typical: $626,625 · max: $626,625 |
08
Key facts
VIDEO
Video walkthrough
Verified video · EN
Fast, Easy, SOLO KORTZ CENTER HEIST Guide! 2026
Setups and the complete heist.
- Channel
- SubscribeForTacos
- Published
- 14 Jul 2026
- Checked
- 29 Aug 2026