Business • Solo / Duo / Trio / Quatro
Hangar Air Freight Cargo
The business card separates entry cost, production or stock preparation, the owner's sale payout and every helper's actual reward.
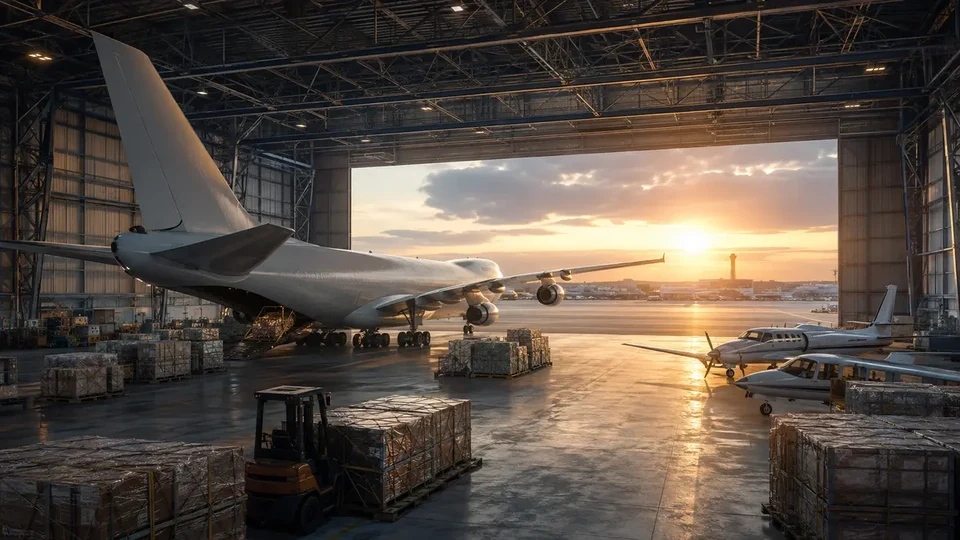 HANGAR / AIR / FREIGHT
01
Complete financial model
0 min • no fixed waitNo fixed cooldown — another cycle can begin immediately after completion.
the sale goes to the owner and every helper receives an extra bonus; it is not deducted from the owner
02
Hangar: from the first Mogul to the first freight sale
BUSINESS STEP BY STEP • COMPLETE WALKTHROUGH
A complete Air Freight Cargo start: buy a Hangar, complete the required Mogul setup, source the first crate through Free Trade Shipping, deliberately choose land or air sourcing and sell a batch sized for the available pilots.
Start here
The correct menu, location and first entry point for Hangar Air Freight Cargo.
Open the phone browser → Money and Services → Maze Bank Foreclosures → Hangars. After purchase, travel to its Hangar icon at the airport or Fort Zancudo.
Inside, watch Ron and Charlie's introduction, then approach the Free Trade Shipping computer in the Hangar office.
Register as CEO/VIP or MC President. The first computer use leads to mandatory Setup rather than the normal category selection.
- If purchase is unavailable, finish active work and wait for Ron's required Freemode introduction.
- An inactive computer usually means the introduction or owner-led setup is incomplete.
- The Cuban 800 is an included personal aircraft; the setup Mogul is mission cargo and does not enter the player's collection.
From zero to the first payout
Buy a Hangar, recover the setup Mogul, choose a cargo category at the Free Trade Shipping computer and deliver the first crate before selling a small batch.
- 011. Buy a HangarThe minimum purchase is $1,200,000; the Hangar itself includes freight storage and a Cuban 800.
- 022. Recover the setup MogulLaunch Setup, take the marked cargo aircraft and land it in your Hangar.
- 033. Choose one categoryFor the first cycle, keep crates in one category instead of diluting the stock-size bonus.
- 044. Complete Source CargoChoose Land or Air, recover the marked cargo and deliver it to the yellow point in the Hangar.
- 055. Sell a small batchLaunch the first sale from the computer in Invite Only; vehicle/drop count depends on the variant and batch.
Hangar setup and the first three crates
Every step states the objective, actions, completion condition and a safe way back after a mistake.
01 Hangar Set Up — Mogul
Goal Activate storage by recovering a Mogul carrying three random freight crates.
Key actions - Select Set Up at the Free Trade Shipping computer and fly to the marked location.
- Clear the immediate guards, enter the Mogul and check its condition before take-off.
- Land at your property's runway and taxi the aircraft into the yellow Hangar point.
Completion point After delivery, the computer exposes Source and Sell categories and storage contains three random setup crates.
What it unlocks next Normal sourcing jobs, Rooster sourcing and Air Freight Cargo sales.
How to recover the run If the Mogul is destroyed, return to the computer and relaunch Setup. Do not buy another Hangar or Cuban 800.
Requirements, purchase and entry budget
The cheapest Hangar costs $1,200,000 and includes a Cuban 800. The Aircraft Workshop, quarters and decor are optional; they do not unlock storage.
Hangar — required warehouse
Status
From $1,200,000 through Maze Bank Foreclosures; location changes travel, not freight mechanics.
- Buy one location and watch the intro.
- Complete Set Up as owner.
Cuban 800
Status
Included with the Hangar at no extra price; it is not the mandatory aircraft for every mission.
- Claim/position the included aircraft after purchase.
- Use it when a source variant benefits from personal flight.
Aircraft Workshop — optional
Status
It modifies owned aircraft; it blocks neither setup, sourcing nor the first sale.
- Skip it on a budget start.
- Add it later only for fleet modifications.
First complete cycle
After setup, complete these actions in Hangar Air Freight Cargo before attempting the first settlement.
01 Open Free Trade Shipping
ActionRegister an organisation and use the computer in the Hangar office.
How to verifyAfter setup, you see cargo categories, storage state and separate Source and Sell options.
How to recover the runIf the terminal is locked, finish active work and register the organisation again.
02 Choose the first land source
ActionPick one category and Land Source to reduce piloting demands on the first run.
How to verifyThe HUD identifies a cargo type and physical objective rather than crediting a crate automatically.
How to recover the runAfter cargo loss, the mission returns to Freemode without a crate; launch a new Source rather than Sell.
03 Deliver and count storage
ActionDeliver every marked package to the yellow Hangar point; with a crew, divide separate packages among pilots/drivers.
How to verifyThe chosen terminal category increases by the number of crates actually delivered.
How to recover the runIf only part was delivered, keep credited crates and top up the category with another Source.
Land sources, air sources and freight storage
Freight is not produced passively: every crate requires a completed Source Cargo mission or a Rooster sourcing order. Categories have separate bonuses for concentrated stock.
The Hangar does not convert Supplies into Stock; a source job or paid Rooster order creates each crate.
The storage bonus depends on matching crates, so one category makes the first cycle clearer.
Full capacity does not mean a safe solo sale; size the batch for staffed vehicles.
Choose sourcing method and pace
Source Cargo — self-run
$0Choose a category and Land/Air variant, complete the objective and physically deliver crates.
Rooster — paid sourcing
Operating fee, random categoryThe order saves an active mission but does not let you choose a category and can dilute the batch bonus.
BASELINE, NOT AN EVENTCategories, capacity and flow are baseline. Weekly freight multipliers do not change crate counts or procedure.
Upgrades after the first cycle
Upgrades are separate purchases. This guide identifies those that change operating results and those that affect only convenience or risk.
After the first sale, evaluate logistics before buying Hangar extras.
The Aircraft Workshop only changes owned-aircraft modification access; it does not increase crate value.
Extras are purchased through property renovation and require no separate mission strand.
The terminal shows storage; property management shows purchased extras.
Decision order
Logistics before upgrades
First establish category, batch size and available pilots.
Aircraft Workshop, Living Quarters and style are optional for this flow.
- The Workshop lets you modify owned aircraft.
- It does not shorten Source, add crates or guarantee one sale vehicle.
Solo or crew — concrete assignment
Batch size and delivery-vehicle count matter more than the warehouse's nominal maximum value.
SOLO — small batch
One player sources one crate at a time and sells before risking multiple stations/vehicles.
CONCRETE ROLES
- The pilot/driver recovers cargo and returns it to the Hangar.
- Before Sell, inspect vehicle and drop count instead of assuming one trip.
DUO–QUAD — pilot + support
Each member takes a separate package or vehicle; the leader coordinates return order.
CONCRETE ROLES
- The strongest pilot takes the most demanding aircraft.
- Support clears drop zones and escorts the slower vehicle.
First Air Freight Cargo sale
Check batch state and team first, then deliberately choose a session and launch settlement from the correct terminal.
- One concentrated category and a deliberately small first batch.
- Armor/snacks and verified piloting ability.
- Invite Only for the first attempt; sales are also available outside public sessions.
- Choose Sell and the category/batch at the terminal.
- Read vehicle and drop counts once the variant loads.
- Assign pilots before leaving the Hangar.
A variant can supply one or several aircraft/vehicles and multiple drops. Do not assume the included Cuban 800 will be used.
Safety or public-session bonus
Invite-only session — first run
Benefit
Protects the aircraft/cargo from rivals while learning the route.
Risk / failure condition
No rival-player bonus; mechanics and baseline settlement remain unchanged.
Public session — deliberate risk
Benefit
A rival-count high-demand bonus may apply; it is not part of this guide's baseline values.
Risk / failure condition
A slow or lightly armed aircraft is an easy target; any bonus does not change baseline storage data.
Delivery families and response
Land sale
How to recognise it
Cargo waits in a road vehicle and the HUD leads to drops or one buyer.
Action
Move the slowest vehicle first, use main roads and split drivers.
Tip
The land option reduces piloting-error risk but still uses a shared timer.
Risk / failure condition
A lost vehicle or missed drops reduce the settled batch.
How to recover the run
Finish surviving vehicles; do not spend the shared timer on irretrievably destroyed cargo.
Airborne drop route
How to recognise it
The HUD shows a sequence of airborne/ground-adjacent drops and a supplied aircraft/helicopter.
Action
Set altitude before the first point, use wide turns and stabilise before each drop.
Tip
Do not dive vertically after a missed point; make a wide turn while preserving the aircraft.
Risk / failure condition
A crash destroys cargo assigned to that aircraft while the timer keeps running for the rest.
How to recover the run
Turn back after a safe miss; after a crash, take a remaining aircraft only if time permits.
Hook lift or heavy-cargo escort
How to recognise it
The objective requires hooking/holding heavy cargo or protecting a slow transport.
Action
The steadiest pilot handles the lift; others clear only threats along the transport path.
Tip
Align above the target before lowering the hook and avoid abrupt corrections with cargo attached.
Risk / failure condition
Losing the lift/transport or destroying the vehicle ends that assigned portion.
How to recover the run
If the hook releases, return vertically over stationary cargo; if the target is destroyed, move the crew to surviving portions.
Settlement covers delivered crates and baseline category bonuses. Missed drops do not automatically become another sale.
What to do next
A repeatable loop after the first successful payout, with cost and risk checked before the next start.
- 01
Choose one category
Build concentrated stock with self-run Source; Rooster may add a random category.
- 02
Size stock for the crew
Sell earlier solo and reserve larger stock for confirmed pilots.
- 03
Sell and return to Source
After settlement, select the same category again; an event does not change the procedure.
Common mistakes and fixes
Waiting for passive production
FixEvery crate requires Source or a paid Rooster order.
Randomly mixing categories
FixSource one category for the first cycle to retain a clear batch bonus.
Full storage as the first solo run
FixSell a small batch and learn vehicle assignment before scaling.
Checklist: have / done / ready to settle
HAVE
A setup-complete Hangar
An active organisation
DONE
Selected one category
Delivered at least one crate
READY TO SELL
Batch fits the number of pilots
Everyone knows their vehicle/drop
Common blockers and recovery
Repair the business or current mission state; do not repurchase a property as a workaround.
The terminal only shows Setup or is locked
Check in order
- Register an organisation.
- Complete the intro and Mogul Setup as owner.
A source crate disappeared or was destroyed
Check in order
- Check whether another crew member carries it.
- Check credited stock after the mission ends.
Part of the sale vehicles were lost
Check in order
- Count surviving vehicles and remaining time.
- Assign drivers only to reachable routes.
03
Expanded informational overview
Guide scopeThis section organizes the complete cycle: requirements, phases, figures and dependencies. The detailed operation flow is in the walkthrough above.
04
How the full cycle works
This section complements the walkthrough with full-cycle dependencies: unlock, preparations, finale, settlement and the next available attempt.
Purchase and unlock
The base requirement is Hangar; the minimum entry cost is shown in the financial panel.
Setup
The business must be configured and remain active. Upgrades should be evaluated separately from the property price.
Job preparation
Job value and preparation time form one result rather than separate earnings.
Sale or collection
The panel separates owner proceeds, costs, commissions and extra helper rewards.
Next cycle
No fixed cooldown — another cycle can begin immediately after completion.
05
What affects the result
The range shows small, typical and full variants where value is variable.
Supply costs and agent fees are deducted before the owner's result.
Owner proceeds plus a separate reward for each helper. The sale value is not split equally.
The comparison uses 3 hrs 30 min / 5 hrs / 8 hrs for the complete cycle.
Main strengths
- Can combine active sales with passive value accrual.
- Helpers do not automatically reduce the owner's proceeds.
Constraints
- Purchase payback depends on regular use.
- A helper's reward can be far lower than the owner's proceeds and is shown separately.
06
Solo / Duo / Trio / Quatro variants
Every supported team size shows its host, partner and team model. Provisional rates are clearly labelled, and incomplete data is explained alongside the result.
Solo: full pace control and no crew wait.
- Host / owner
- $1,000,000
- Team net
- $1,000,000
- Cooldown
- 0 minno fixed wait
Duo: the owner keeps the proceeds and 1 helper receive separate rewards.
- Host / owner
- $1,000,000
- Each partner
- $60,000
- Team net
- $1,060,000
- Cooldown
- 0 minno fixed wait
Trio: the owner keeps the proceeds and 2 helpers receive separate rewards.
- Host / owner
- $1,000,000
- Each partner
- $60,000
- Team net
- $1,120,000
- Cooldown
- 0 minno fixed wait
Quatro: the owner keeps the proceeds and 3 helpers receive separate rewards.
- Host / owner
- $1,000,000
- Each partner
- $60,000
- Team net
- $1,180,000
- Cooldown
- 0 minno fixed wait
07
Complete figures by team
Typical values for the selected cycle; every cell also contains a min–max range.
| Team | Cooldown | Team gross | Costs + fees | Host / owner | Each partner | Team net | Host / owner $/h | Team $/h |
|---|---|---|---|---|---|---|---|---|
| SOLO | 0 minCooldown • no fixed wait | $1,000,000min: $500,000 · typical: $1,000,000 · max: $2,550,000 | $0min: $0 · typical: $0 · max: $0 | $1,000,000min: $500,000 · typical: $1,000,000 · max: $2,550,000 | — | $1,000,000min: $500,000 · typical: $1,000,000 · max: $2,550,000 | $200,000min: $100,000 · typical: $200,000 · max: $510,000 | $200,000min: $100,000 · typical: $200,000 · max: $510,000 |
| DUO | 0 minCooldown • no fixed wait | $1,000,000min: $500,000 · typical: $1,000,000 · max: $2,550,000 | $0min: $0 · typical: $0 · max: $0 | $1,000,000min: $500,000 · typical: $1,000,000 · max: $2,550,000 | $60,000min: $50,000 · typical: $60,000 · max: $60,000 | $1,060,000min: $550,000 · typical: $1,060,000 · max: $2,610,000 | $200,000min: $100,000 · typical: $200,000 · max: $510,000 | $212,000min: $110,000 · typical: $212,000 · max: $522,000 |
| TRIO | 0 minCooldown • no fixed wait | $1,000,000min: $500,000 · typical: $1,000,000 · max: $2,550,000 | $0min: $0 · typical: $0 · max: $0 | $1,000,000min: $500,000 · typical: $1,000,000 · max: $2,550,000 | $60,000min: $50,000 · typical: $60,000 · max: $60,000 | $1,120,000min: $600,000 · typical: $1,120,000 · max: $2,670,000 | $200,000min: $100,000 · typical: $200,000 · max: $510,000 | $224,000min: $120,000 · typical: $224,000 · max: $534,000 |
| QUATRO | 0 minCooldown • no fixed wait | $1,000,000min: $500,000 · typical: $1,000,000 · max: $2,550,000 | $0min: $0 · typical: $0 · max: $0 | $1,000,000min: $500,000 · typical: $1,000,000 · max: $2,550,000 | $60,000min: $50,000 · typical: $60,000 · max: $60,000 | $1,180,000min: $650,000 · typical: $1,180,000 · max: $2,730,000 | $200,000min: $100,000 · typical: $200,000 · max: $510,000 | $236,000min: $130,000 · typical: $236,000 · max: $546,000 |
08
Key facts
VIDEO
Video walkthrough
Verified video · EN
The ONLY Hangar Business Guide You Need to Make MILLIONS Completely SOLO in GTA Online
Sourcing, cargo bonuses, warehouse and solo sale.
- Channel
- Hazard
- Published
- 21 Jun 2026
- Checked
- 29 Aug 2026