Heist • Duo / Trio / Quatro
Doomsday — Act II
Five prep jobs unlock four setups, followed by a finale split between a Stromberg team inside the submarine and Air Support in the Avenger.
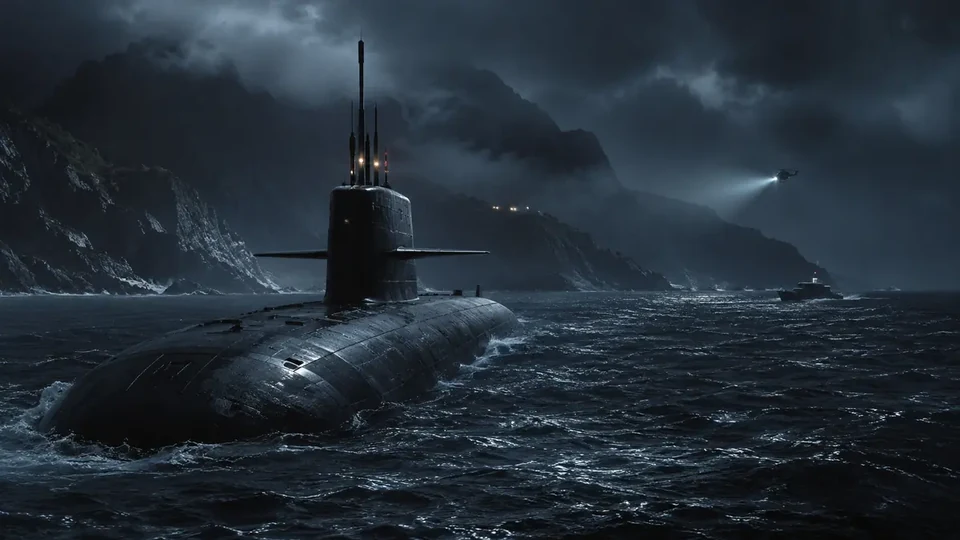 DOOMSDAY / ACT / 2
01
Complete financial model
ADJUSTABLE CUT
Manual finale split
Set every player's cut. The minimum is 15%, adjustments use 5% steps, and the total always remains 100%.
Cut total100%
48 minGroup heists have a 48 min wait after the finale.
Verified permanent rules
Gross finale pool — Doomsday Act II
- The host's per-activity state determines first-weekly finale eligibility; the increase covers every player. Unofficial partner rates are labelled separately in the model.
| Payout target | Repeat — Normal | Repeat — Hard | First weekly — Normal | First weekly — Hard |
|---|---|---|---|---|
| The Bogdan Problem | $1,282,500 | $1,603,125 | $1,567,215 | $1,959,019 |
Player cuts and prep/setup rewards are separate.
ranking baseline: the host takes the maximum cut and every partner gets 15%; the guide supports individual cuts, while the host pays the setup cost
02
Complete step-by-step operation
OPERATIONS GUIDE V2 • DUO
Five prep jobs unlock four setups, followed by a finale split between a Stromberg team inside the submarine and Air Support in the Avenger.
Start here
- Buy a Facility through Maze Bank Foreclosures and complete Lester's Doomsday Heist introduction.
Use the Facility planning screen and select “Doomsday Act II: The Bogdan Problem”.
The planning room inside the host's Facility.
The Doomsday Heist screen containing preps, setups and the finale.
- Owning an Avenger and the other Facility expansions is not required to launch the act.
First run and replay
These are two persistent story instructions. They are not the finance calculator's weekly-variant switch.
First story playthrough
The first “Doomsday Act II: The Bogdan Problem” run unlocks each prep and setup in Facility-board order; the finale stays locked until the board is complete.
Story replay
After completion, select an available act again on the Facility screen and repeat its preps, setups and finale without changing the money model.
Official mission order
- 01
prep / preparation Prep: Keycards
Acquire the Merryweather access cards.
- 02
setup Setup: Avenger
Recover the Avenger from the dark LSIA hangar.
- 03
prep / preparation Prep: ULP Intel
Acquire intelligence on ULP's holding location.
- 04
setup Setup: Rescue ULP
Two teams locate ULP in the foundry and cover the extraction.
- 05
prep / preparation Prep: Riot Control Van
Steal the RCV needed to extinguish the burning wrecks.
- 06
setup Setup: Salvage Hard Drives
Extinguish the wrecks and recover the drives before they are destroyed.
- 07
prep / preparation Prep: Strombergs
Acquire the Strombergs for the underwater operation.
- 08
prep / preparation Prep: Torpedo ECU
Steal the torpedo control units from the barge.
- 09
setup Setup: Submarine Recon
Use the Strombergs to recon the submarine.
- 10
finale The Bogdan Problem
The Submarine Team meets Bogdan while Air Support holds the Avenger and completes extraction.
Strategies that genuinely change the route
Submarine Team and Air Support
- When
- After Salvage Hard Drives, Strombergs, Torpedo ECU and Submarine Recon.
- Plan
- One group enters the submarine and resolves Bogdan while the other keeps the Avenger alive and prepares pickup after surfacing.
- Trade-off
- Speed inside the submarine does not help if the Avenger is destroyed; both branches end in one shared extraction.
Plan for the selected team: DUO
Selected in the calculator • DUO for “Doomsday Act II: The Bogdan Problem”: Player A: Submarine lead + Avenger pilot; Player B: Submarine support + Avenger gunner.
Concrete roles
Leads the Stromberg, airlock entry and correct route to Bogdan. Keeps the aircraft outside incoming fire and positions final pickup.
Covers corridors and avoids unnecessary fights before the objective. Destroys helicopters and threats to the Avenger and returning pair.
Actions, risk and run recovery
- 01
prep / preparationPrep — Keycards - Action
- Take the Police Riot carrying the LSIA hangar keycards, lose the police and deliver it to the Facility.
- Tip
- Acquire the complete Keycard set and confirm it on the Facility screen.
- Risk / failure condition
- A missing card blocks access required for the Avenger setup.
- How to recover the run
- Return to the last holder, collect the card and deliver the full set.
- 02
setupSetup — Avenger - Action
- Enter the dark hangar, clear its levels, start the backup generators and fly the Avenger to the delivery point.
- Tip
- In Avenger the pilot maintains movement while the gunner prioritizes air threats.
- Risk / failure condition
- Hovering in the center of fire can destroy the setup aircraft.
- How to recover the run
- Move outside missile range, clear helicopters at distance and re-approach.
- 03
prep / preparationPrep — ULP Intel - Action
- Eliminate the kidnappers, search the apartment, take the bag containing ULP intel and deliver it to the Facility.
- Tip
- For ULP Intel one operator collects data while the crew holds exit routes.
- Risk / failure condition
- A scattered crew can lose the data carrier or exit after the alarm.
- How to recover the run
- Return to the operator, clear the nearest corridor and escort them out together.
- 04
setupSetup — Rescue ULP - Action
- The Ground Team enters the foundry and reaches ULP while the Lookout Team covers from outside; together they secure his extraction.
- Tip
- In Rescue ULP keep the protected target behind cover and open each sector before moving him.
- Risk / failure condition
- An overextended escort exposes ULP to heavy fire.
- How to recover the run
- Return to the target, remove the nearest threat and resume with ULP inside the formation.
- 05
prep / preparationPrep — Riot Control Van - Action
- Start a riot with tear gas, wait for security to respond, steal the RCV, lose the pursuit and deliver it to the Facility.
- Tip
- Capture the Riot Control Van intact and move it only after breaking the nearest police pressure.
- Risk / failure condition
- A destroyed van blocks the hard-drive setup.
- How to recover the run
- Hold the vehicle behind cover, clear pursuers and resume on a controlled route.
- 06
setupSetup — Salvage Hard Drives - Action
- RCV Operators extinguish burning vans at four locations while the Salvage Team recovers the drives and returns under vehicle cover.
- Tip
- At Salvage Hard Drives the diver collects one drive at a time while cover holds the exit.
- Risk / failure condition
- A missed drive or lost operator leaves the prep incomplete.
- How to recover the run
- Return to the last underwater marker, confirm the drive and surface at shared cover.
- 07
prep / preparationPreps — Strombergs and Torpedo ECU - Action
- Locate the wrecked Stromberg transports and deliver the cars, then assault the offshore barge and recover the torpedo control units.
- Tip
- Complete the Strombergs and Torpedo ECU as one package before Submarine Recon.
- Risk / failure condition
- A missing vehicle or ECU locks the submarine setup.
- How to recover the run
- Return to the exact incomplete row and deliver the missing item before launch.
- 08
setupSetup — Submarine Recon - Action
- Use the Strombergs to destroy the convoy, clear sea mines, scan the wreck and Russian submarine, then return the vehicles after surfacing.
- Tip
- In Submarine Recon move the Strombergs as a pair and do not leave one at the sonar.
- Risk / failure condition
- A split pair leaves the operator without crossfire underwater.
- How to recover the run
- Return to the last shared point, regroup the vehicles and retry together.
- 09
finaleFinale split - Action
- Assign a Submarine Team to the Stromberg and Air Support to the Avenger. The air crew holds above the vessel and fights off helicopters.
- Tip
- Before the finale name Submarine Team and Air Support and confirm the Stromberg and Avenger pilots.
- Risk / failure condition
- Swapping roles splits objectives and can leave the Avenger without a pilot.
- How to recover the run
- Restart before the split and restore each pair's vehicle and objective.
- 10
finaleInside the submarine - Action
- The Submarine Team clears the crew, finds the contact, reaches the control room, photographs the intel table and plugs Clifford into the console.
- Tip
- Inside the submarine one player leads to Bogdan while the other closes corridors and handles objectives.
- Risk / failure condition
- A solo sprint opens new rooms without partner cover.
- How to recover the run
- Return to the last door, regroup and clear one compartment at a time.
- 11
finaleAvenger extraction - Action
- After the control-room sequence, the team leaves the submarine, returns to shore, rejoins Air Support and delivers the Avenger to the hangar.
- Tip
- Air Support keeps the Avenger outside the battle center until surfacing is confirmed.
- Risk / failure condition
- Landing early exposes the aircraft to helicopters and ground fire.
- How to recover the run
- Circle safely, clear aircraft and approach only on the Submarine Team's call.
Common mistakes
Incomplete prep chain
- Consequence
- One missing item blocks a setup or leaves the finale without its required vehicle and access.
- Correction
- Return to the exact incomplete Facility row and do not launch the finale until it is confirmed.
Avenger exposed to fire
- Consequence
- Hovering in the battle centre can destroy the Avenger even while the Submarine Team succeeds.
- Correction
- Leave missile range, clear helicopters at distance and return only on the surfacing call.
No shared extraction
- Consequence
- Surfacing far from the Avenger exposes the pair and stretches final extraction.
- Correction
- Stay by the Stromberg's cover, mark position and let the Avenger make a new controlled approach.
Pre-launch checklist
Submarine Team and Air Support know their independent goals and reunion call.
The Avenger does not enter pickup range before the surfacing call.
Check Keycards, ULP Intel, Riot Control Van, hard drives, Strombergs and Torpedo ECU before Submarine Recon.
The pilot maintains movement and distance while the gunner prioritizes air threats over distant infantry.
The Submarine Team calls exit before surfacing and Air Support sets one pickup side.
03
Expanded informational overview
Guide scopeThis section organizes the complete cycle: requirements, phases, figures and dependencies. The detailed operation flow is in the walkthrough above.
04
How the full cycle works
This section complements the walkthrough with full-cycle dependencies: unlock, preparations, finale, settlement and the next available attempt.
Unlock
Base requirement: Facility. Minimum entry cost is kept separate from the setup fee.
Plan configuration
Available approach, target, difficulty and team choices determine later costs and payout distribution.
Preparations
The model's full time includes required preparation; optional items trade extra time for a safer run.
Finale
The result depends on target or pool value, participant count, possible losses and bonus conditions.
Settlement and replay
After deductions, the pool is distributed using the payout model. Group heists have a 48 min wait after the finale.
05
What affects the result
The min–typical–max range accounts for a variable target, loot or difficulty where applicable.
The setup fee is deducted before the net result is calculated.
Player count and NPC crew fees can change the host and each partner's payout.
The model compares 1 hr 30 min / 2 hrs 5 min / 3 hrs 5 min, not the finale alone.
Main strengths
- High payout per completed cycle.
- Clear split between preparation, finale and settlement.
Constraints
- Entry and setup costs reduce the first return.
- The result depends on team size, cuts and cooldown.
06
Solo / Duo / Trio / Quatro variants
Every supported team size shows its host, partner and team model. Provisional rates are clearly labelled, and incomplete data is explained alongside the result.
Duo: the default ranking model is 85% for the host and 15% for every partner; the guide lets you set individual cuts, while the setup cost is deducted only from the host.
- Host / owner
- $1,065,125
- Each partner
- $192,375
- Team net
- $1,257,500
- Cooldown
- 48 min
Trio: the default ranking model is 70% for the host and 15% for every partner; the guide lets you set individual cuts, while the setup cost is deducted only from the host.
- Host / owner
- $872,750
- Each partner
- $192,375
- Team net
- $1,257,500
- Cooldown
- 48 min
Quatro: the default ranking model is 55% for the host and 15% for every partner; the guide lets you set individual cuts, while the setup cost is deducted only from the host.
- Host / owner
- $680,375
- Each partner
- $192,375
- Team net
- $1,257,500
- Cooldown
- 48 min
07
Complete figures by team
Typical values for the selected cycle; every cell also contains a min–max range.
| Team | Cooldown | Team gross | Costs + fees | Host / owner | Each partner | Team net | Host / owner $/h | Team $/h |
|---|---|---|---|---|---|---|---|---|
| DUO | 48 minCooldown | $1,282,500min: $1,282,500 · typical: $1,282,500 · max: $1,282,500 | $25,000min: $25,000 · typical: $25,000 · max: $25,000 | $1,065,125min: $1,065,125 · typical: $1,065,125 · max: $1,065,125 | $192,375min: $192,375 · typical: $192,375 · max: $192,375 | $1,257,500min: $1,257,500 · typical: $1,257,500 · max: $1,257,500 | $511,260min: $511,260 · typical: $511,260 · max: $511,260 | $603,600min: $603,600 · typical: $603,600 · max: $603,600 |
| TRIO | 48 minCooldown | $1,282,500min: $1,282,500 · typical: $1,282,500 · max: $1,282,500 | $25,000min: $25,000 · typical: $25,000 · max: $25,000 | $872,750min: $872,750 · typical: $872,750 · max: $872,750 | $192,375min: $192,375 · typical: $192,375 · max: $192,375 | $1,257,500min: $1,257,500 · typical: $1,257,500 · max: $1,257,500 | $418,920min: $418,920 · typical: $418,920 · max: $418,920 | $603,600min: $603,600 · typical: $603,600 · max: $603,600 |
| QUATRO | 48 minCooldown | $1,282,500min: $1,282,500 · typical: $1,282,500 · max: $1,282,500 | $25,000min: $25,000 · typical: $25,000 · max: $25,000 | $680,375min: $680,375 · typical: $680,375 · max: $680,375 | $192,375min: $192,375 · typical: $192,375 · max: $192,375 | $1,257,500min: $1,257,500 · typical: $1,257,500 · max: $1,257,500 | $326,580min: $326,580 · typical: $326,580 · max: $326,580 | $603,600min: $603,600 · typical: $603,600 · max: $603,600 |
CALCULATOR
Custom scenario calculator
Enter your own pool, costs and fees, then set every player's cut.
ADJUSTABLE CUT
Manual finale split
Set every player's cut. The minimum is 15%, adjustments use 5% steps, and the total always remains 100%.
Cut total100%
08
Key facts
VIDEO
Video walkthrough
Verified video · EN
GTA Online: Doomsday Heist Act #2 with 2 Players (Elite & Criminal Mastermind II)
All preps, setups and finale; retained for mechanics rather than current payouts.
- Channel
- GTA Series Videos
- Published
- 22 Jan 2018
- Checked
- 29 Aug 2026