Contract • Solo / Duo / Trio / Quatro
The Brute Force File
Acquire a military pass, vehicle, armor and override key, then infiltrate Fort Zancudo to steal the Future Shock Scarab.
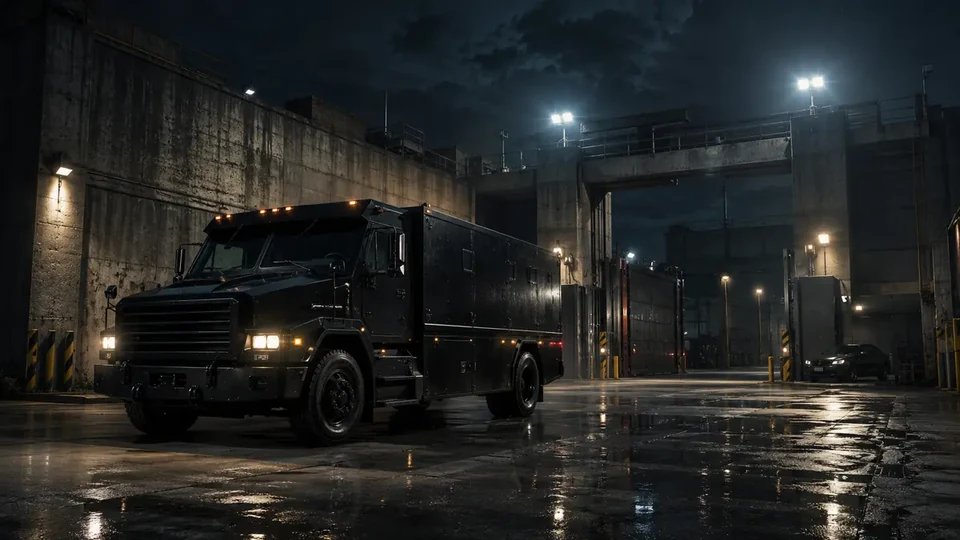 BRUTE / FORCE / FILE
01
Complete financial model
Rotation-dependent • no single fixed minute valueThere is no single confirmed minute value; availability depends on a board, phone call or contract rotation.
Verified permanent rules
Priority File
- One board entry is the weekly Priority File, and its increased payout is available once before the reset.
- The permanent Priority multiplier is ×2; the Challenge worth up to $50,000 is a separate condition and is not part of the multiplier.
- Priority File is not a GTA+ benefit; the current weekly file is not hard-coded into the guide.
- No official partner rate is published: detailed walkthroughs for all four Files indicate $25,000 for the finale; the Challenge worth up to $50,000 is settled separately (confidence B).
| Payout target | Base payout | Priority ×2 |
|---|---|---|
| Brute Force File | $158,000 | $316,000 |
host and every partner have a separately defined payout
02
Complete step-by-step operation
OPERATIONS GUIDE V2 • SOLO
Acquire a military pass, vehicle, armor and override key, then infiltrate Fort Zancudo to steal the Future Shock Scarab.
Start here
- Buy the Darnell Bros Garment Factory through Maze Bank Foreclosures and complete the FIB Files introduction.
Select “The Brute Force File — complete flow” on the Factory office computer when the file is available.
The operations office inside the Darnell Bros Garment Factory.
The FIB Files computer with three preparations and a finale.
- Other Factory facilities and personal vehicles are not prerequisites for launching a selected file.
First run and replay
These are two persistent story instructions. They are not the finance calculator's weekly-variant switch.
First story playthrough
The first “The Brute Force File — complete flow” selection runs through the three preparations on the Factory computer before unlocking the file finale.
Story replay
Select a replay from the computer when the file is available; repeat its preparations while keeping payouts in the separate finance panel.
Official mission order
- 01
prep / preparation Infiltration Equipment
Acquire the equipment used to enter Fort Zancudo under cover.
- 02
prep / preparation Private Military Armor
Prepare armor for the fight after the cover breaks.
- 03
prep / preparation Override Key
Acquire the override key for the Scarab lock.
- 04
finale The Brute Force File
Reach the loading bay, override the Scarab and extract it through the tunnel.
Strategies that genuinely change the route
Disguise to elevator, force out in the Scarab
- When
- After acquiring the pass, military vehicle, armor and override key.
- Plan
- Maintain cover through the gate and hangar, clear the loading bay, override the Scarab and escape through the tunnel using its weapons.
- Trade-off
- A quiet entry preserves resources for the forced extraction; a gate alarm brings the full base onto the crew too early.
Plan for the selected team: SOLO
Selected in the calculator • SOLO for “The Brute Force File — complete flow”: SOLO operator: Disguise lead + Loading-bay lead + Override-key operator + Scarab driver.
Concrete roles
Drives through the gate and presents the pass at the elevator. Clears the route to the secured Scarab. Inserts the key and holds the vehicle until the immobilizer override completes. Drives through the tunnel, uses armor and delivers the vehicle intact.
Actions, risk and run recovery
- 01
prep / preparationInfiltration Equipment - Action
- Take out the NCO at the military lockup, collect the pass, steal a military vehicle and stash it near the Garment Factory.
- Tip
- For Infiltration Equipment collect the full set and preserve it for the Zancudo entry.
- Risk / failure condition
- A missing item breaks cover before the hangar.
- How to recover the run
- Return to the active crate, collect the missing item and confirm the set on the Factory computer.
- 02
prep / preparationPrivate Military Armor - Action
- Break into the Merryweather lockup, inspect the Contenders' rear doors, find the armor shipment and deliver the correct vehicle.
- Tip
- Move the Private Military Armor in one protected vehicle without starting combat at the crate.
- Risk / failure condition
- Destroying the transport removes finale protection and credible entry.
- How to recover the run
- Draw enemies away, recover the vehicle and finish delivery by a safe route.
- 03
prep / preparationOverride Key - Action
- Inside The Music Locker, identify the photographed contact, collect the Scarab override key and return it to the Factory.
- Tip
- The assigned operator takes the Override Key and keeps it through the Scarab phase.
- Risk / failure condition
- Leaving without the key blocks the vehicle takeover in the loading bay.
- How to recover the run
- Return to the target's last position, search it and confirm the marker disappears.
- 04
finaleEntering Zancudo - Action
- Equip the prepared outfit, take the stashed military vehicle and present the pass at Fort Zancudo's main gate.
- Tip
- Enter Zancudo with the complete infiltration set and keep weapons holstered before security.
- Risk / failure condition
- An early alarm locks down the elevator and surrounds the crew in the open.
- How to recover the run
- Fall back to the last cover, regroup and switch to one controlled entry.
- 05
finaleHangar and elevator - Action
- Park beside the marked hangar without raising suspicion, show the elevator pass to the guard and descend underground.
- Tip
- In the hangar the lead preserves cover to the elevator while the key operator stays inside the formation.
- Risk / failure condition
- A separated player can trigger security before reaching the loading bay.
- How to recover the run
- Hold the elevator, collect the final player and descend only with the full crew.
- 06
finaleLoading bay - Action
- Fight through to the loading bay, clear security and locate the Future Shock Scarab in the secured section.
- Tip
- In the loading bay defenders close entrances before the operator approaches the Scarab.
- Risk / failure condition
- The interaction is interrupted under crossfire and exposes the operator.
- How to recover the run
- Leave the vehicle, clear the nearest positions and retry on the cover call.
- 07
finaleOverride the Scarab - Action
- Enter the vehicle, insert the acquired key and hold the area until the immobilizer override completes.
- Tip
- Use the Override Key without changing operators and have the driver board only after full unlock.
- Risk / failure condition
- Trying to drive early leaves the Scarab locked in the kill zone.
- How to recover the run
- Protect the panel, finish the override and only then take the driver's seat.
- 08
finaleEscape tunnel - Action
- Drive the Scarab through the underground escape tunnel, using its armor and weapons against the military blockade.
- Tip
- In the tunnel the driver holds the center while the gunner destroys only roadblocks on the exit line.
- Risk / failure condition
- Stopping for side targets lets reinforcements close the exit.
- How to recover the run
- Reverse to the last straight, clear the central block and resume without stops.
- 09
finaleDeliver the Scarab - Action
- Leave the Zancudo area, survive the pursuit and deliver the Scarab to the buyer intact.
- Tip
- Deliver the Scarab on one route and keep cover behind it through the final marker.
- Risk / failure condition
- The heavy vehicle can be surrounded and stopped if unescorted.
- How to recover the run
- Hold in cover, wait for support and resume as a tight convoy.
Common mistakes
Cover broken at the gate
- Consequence
- Weapons or the wrong vehicle at the main gate trigger full security before the underground route.
- Correction
- Leave the checkpoint line, lose the alarm outside and reapproach in the correct vehicle with weapons holstered.
Override in an uncleared loading bay
- Consequence
- The stationary immobilizer phase exposes the operator and can destroy the objective before activation.
- Correction
- Leave the vehicle, clear the nearest wave, rebuild two cover sectors and insert the key again.
Scarab blocked in the tunnel
- Consequence
- Getting stuck on a wreck lets the military focus fire on one stationary target.
- Correction
- Reverse to a wider section, use the weapons on the blockade and move only when the tunnel width is clear.
Pre-launch checklist
Outfit, military vehicle and pass are ready for a controlled main-gate entry.
The loading bay has cover, an override operator and a named Scarab driver.
Wear the prepared outfit, use the stashed vehicle and stop exactly for the pass check.
The operator enters the Scarab only after cover controls the bay entrances.
The driver destroys obstacles before entering rather than stopping in crossfire.
03
Expanded informational overview
Guide scopeThis section organizes the complete cycle: requirements, phases, figures and dependencies. The detailed operation flow is in the walkthrough above.
04
How the full cycle works
This section complements the walkthrough with full-cycle dependencies: unlock, preparations, finale, settlement and the next available attempt.
Unlock
Requirement: Garment Factory.
Contract selection
Availability may depend on a board, phone call or activity rotation.
Preparation
The model includes required stages before the final settlement.
Completion
Team choice affects pace, host payout and each partner's payout.
Replay or rotation
There is no single confirmed minute value; availability depends on a board, phone call or contract rotation.
05
What affects the result
Payout and time cover the complete cycle, not only its final job.
The host and every participant have separately defined payouts; the team average does not replace those values.
Setup fees and commissions are deducted before the net result.
Fast/typical/beginner: 38 min / 55 min / 1 hr 25 min.
Main strengths
- Lower entry cost than major heists.
- Flexible supported team size.
Constraints
- Some contracts depend on board rotation.
- A partner may receive a different payout from the host.
06
Solo / Duo / Trio / Quatro variants
Every supported team size shows its host, partner and team model. Provisional rates are clearly labelled, and incomplete data is explained alongside the result.
Solo: full pace control and no crew wait.
- Host / owner
- $158,000
- Team net
- $158,000
- Rotation
- Rotation-dependentno single fixed minute value
Duo: the host and 1 partner have separate payouts.
- Host / owner
- $158,000
- Each partner
- $25,000No official partner rate is published — detailed walkthroughs for all four Files consistently report $25,000; the Challenge worth up to $50,000 remains separate (confidence B).
- Team net
- $183,000
- Rotation
- Rotation-dependentno single fixed minute value
Trio: the host and 2 partners have separate payouts.
- Host / owner
- $158,000
- Each partner
- $25,000No official partner rate is published — detailed walkthroughs for all four Files consistently report $25,000; the Challenge worth up to $50,000 remains separate (confidence B).
- Team net
- $208,000
- Rotation
- Rotation-dependentno single fixed minute value
Quatro: the host and 3 partners have separate payouts.
- Host / owner
- $158,000
- Each partner
- $25,000No official partner rate is published — detailed walkthroughs for all four Files consistently report $25,000; the Challenge worth up to $50,000 remains separate (confidence B).
- Team net
- $233,000
- Rotation
- Rotation-dependentno single fixed minute value
07
Complete figures by team
Typical values for the selected cycle; every cell also contains a min–max range.
| Team | Cooldown | Team gross | Costs + fees | Host / owner | Each partner | Team net | Host / owner $/h | Team $/h |
|---|---|---|---|---|---|---|---|---|
| SOLO | Rotation-dependentRotation • no single fixed minute value | $158,000min: $158,000 · typical: $158,000 · max: $158,000 | $0min: $0 · typical: $0 · max: $0 | $158,000min: $158,000 · typical: $158,000 · max: $158,000 | — | $158,000min: $158,000 · typical: $158,000 · max: $158,000 | $172,364min: $172,364 · typical: $172,364 · max: $172,364 | $172,364min: $172,364 · typical: $172,364 · max: $172,364 |
| DUO | Rotation-dependentRotation • no single fixed minute value | $183,000min: $183,000 · typical: $183,000 · max: $183,000 | $0min: $0 · typical: $0 · max: $0 | $158,000min: $158,000 · typical: $158,000 · max: $158,000 | $25,000min: $25,000 · typical: $25,000 · max: $25,000 | $183,000min: $183,000 · typical: $183,000 · max: $183,000 | $172,364min: $172,364 · typical: $172,364 · max: $172,364 | $199,636min: $199,636 · typical: $199,636 · max: $199,636 |
| TRIO | Rotation-dependentRotation • no single fixed minute value | $208,000min: $208,000 · typical: $208,000 · max: $208,000 | $0min: $0 · typical: $0 · max: $0 | $158,000min: $158,000 · typical: $158,000 · max: $158,000 | $25,000min: $25,000 · typical: $25,000 · max: $25,000 | $208,000min: $208,000 · typical: $208,000 · max: $208,000 | $172,364min: $172,364 · typical: $172,364 · max: $172,364 | $226,909min: $226,909 · typical: $226,909 · max: $226,909 |
| QUATRO | Rotation-dependentRotation • no single fixed minute value | $233,000min: $233,000 · typical: $233,000 · max: $233,000 | $0min: $0 · typical: $0 · max: $0 | $158,000min: $158,000 · typical: $158,000 · max: $158,000 | $25,000min: $25,000 · typical: $25,000 · max: $25,000 | $233,000min: $233,000 · typical: $233,000 · max: $233,000 | $172,364min: $172,364 · typical: $172,364 · max: $172,364 | $254,182min: $254,182 · typical: $254,182 · max: $254,182 |
08
Key facts
VIDEO
Video walkthrough
Verified video · EN
The Brute Force File SOLO Money Guide For GTA Online!
Complete solo File walkthrough.
- Channel
- Tylarious
- Published
- 28 Jun 2026
- Checked
- 29 Aug 2026