Mobile business • Solo
Acid Lab
The complete route from Ron's call and Liquor Ace through all six named First Dose missions, the free Brickade, equipment theft and Mutt's installation to first production and a Manchez Scout C sale.
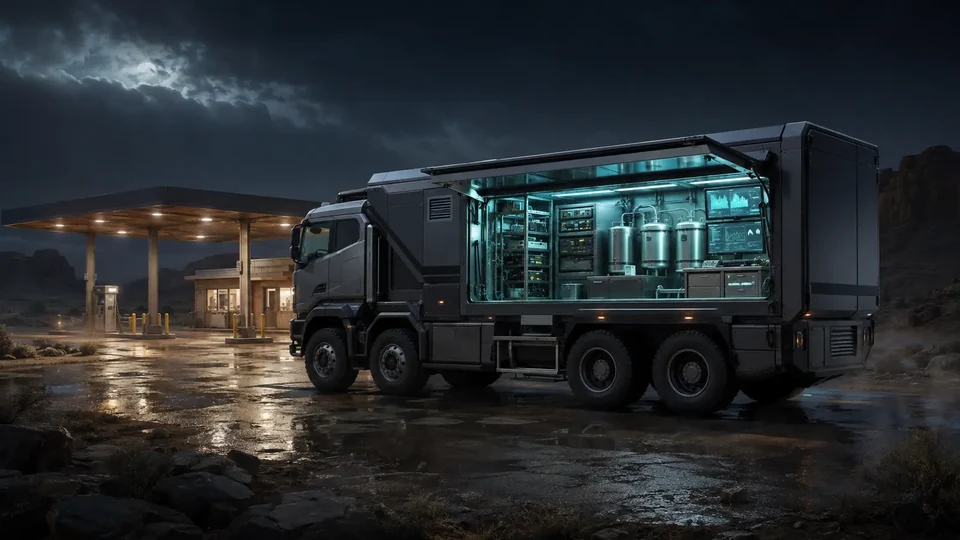 ACID / LAB
01
Complete financial model
4 hrs • range: 3 hrs–6 hrsThere is no separate sale cooldown; another full result requires a new production cycle.
the sale belongs to the owner; helpers receive a separate bonus when the activity provides one
02
Acid Lab: from the first marker to the first sale
BUSINESS STEP BY STEP • COMPLETE WALKTHROUGH
A complete route for a new character: meeting the Fooliganz, all six First Dose missions, the free Brickade 6x6, lab equipment and installation, first production and a safe solo sale.
Start here
The first map point, the correct contact and what to check when the game does not show the start.
Liquor Ace in Sandy Shores, Blaine County — go upstairs above the store.
After Ron Jakowski calls, a yellow R appears at Liquor Ace. Enter the yellow mission marker when you arrive.
No property or rank is required. Launch “First Dose 1 — Welcome to the Troupe” as leader; the strand can be completed solo in an invite-only session.
- Finish any active job and remain outdoors in Freemode so Ron can call.
- Inspect the Sandy Shores area on the map; buying a Brickade is not required for the R to appear.
- If R is still absent, make sure mission blips are not hidden, then change session or restart GTA Online.
From zero to the first sale
This order separates story missions, free acquisitions and required spending. Do not skip the equipment step.
- 011. Welcome to the TroupeHelp Dax and deliver his Journey II to the new base.
- 022. Designated DriverRecover party supplies, the Lost MC plans and their product.
- 033. Fatal IncursionHit Stab City and fly the recovered product out in a Dodo.
- 044. Uncontrolled SubstanceComplete the Fooliganz' hallucinatory initiation.
- 055. Make War not LoveDestroy the hippies' production and the Altruists' deliveries.
- 066. Off the RailsRecover the chemicals and deliver the free Brickade 6x6 to The Freakshop.
- 077. Lab equipmentChoose a warehouse, load three pallets and deliver them to The Freakshop.
- 088. Installation with MuttPay $750,000 to install the lab in the Brickade you earned.
- 099. Name, supplies and productionRequest the lab, name the product, add supplies and activate the boost.
- 1010. First saleChoose a session, launch the sale at the product shelf and complete the Manchez Scout C route.
All six First Dose missions — correct order
Every part has its own goal, endpoint and unlock. Launch later missions at the yellow D outside The Freakshop.
01 First Dose 1 — Welcome to the Troupe
Goal Defend the Fooliganz from the Lost MC and recover Dax's Journey II RV.
Key actions - After the Liquor Ace cutscene, repel the Lost MC and meet Dax.
- Cross the Alamo Sea by boat, clear Millar's Fishery and take the orange Journey II.
- Drive the RV back for Dax; protect its health bar, then take him to the marked warehouse in Los Santos.
Completion point The mission ends when the Journey II reaches the yellow point at the abandoned warehouse — the new Freakshop.
What it unlocks next The Freakshop, Dax as a phone contact, Fooligan Jobs and the yellow D that starts mission two.
How to recover the run If the RV is badly damaged, stop fighting the pursuit and drive for the objective; a failure restarts from the latest checkpoint.
02 First Dose 2 — Designated Driver
Goal Recover party supplies plus the Lost MC's intelligence and product.
Key actions - Start at the yellow D outside The Freakshop, travel to Jetsam Terminal and connect a truck cab to the marked trailer.
- Drive toward The Freakshop; after the ambush and the trailer catching fire, abandon it before it explodes.
- At the Lost MC clubhouse, clear the interior, photograph the planning board with Snapmatic, take the black bag, fill it with product and return to The Freakshop.
Completion point Delivering the bag to The Freakshop completes the mission.
What it unlocks next First Dose 3 — Fatal Incursion at the same yellow D.
How to recover the run The burning trailer is scripted, so do not try to save it; after it explodes, continue in any working vehicle.
03 First Dose 3 — Fatal Incursion
Goal Destroy the Lost MC operation and seize their product at Millar's Fishery.
Key actions - At Stab City, destroy the marked motorcycles, vans and other property until the objective is complete.
- At Millar's Fishery, clear enemies and collect every package from sheds, the dock and around the buildings.
- Take the Dodo at the end of the dock, fly to Los Santos and land carefully on the yellow point in the storm drain.
Completion point Reaching the storm-drain point in the Dodo ends the mission; a perfect first landing is not required.
What it unlocks next First Dose 4 — Uncontrolled Substance.
How to recover the run If you overshoot without crashing, taxi or turn back along the channel; do not abandon the aircraft unnecessarily.
04 First Dose 4 — Uncontrolled Substance
Goal Survive the Fooliganz initiation and complete every changing hallucination sequence.
Key actions - After the cutscene, follow Dax and enter each gateway indicated by the HUD.
- During each transformation, follow the markers, go down the rabbit hole and chase the rabbit when prompted.
- Continue until the Come Down phase; dying during the sequence respawns you instead of ending the whole mission.
Completion point The sequence ends after the comedown at Up-n-Atom in Downtown Vinewood.
What it unlocks next First Dose 5 — Make War not Love.
How to recover the run Do not look for a normal route outside the effect — follow the on-screen gateways and markers; after respawning, continue the current phase.
05 First Dose 5 — Make War not Love
Goal Shut down the hippies' rival production and the Altruists' deliveries.
Key actions - At the hippie camp, clear the area and destroy the lab equipment and marked vans; explosive barrels speed up clearing the tents.
- Enter the brightly coloured van to reveal the next deliveries, then destroy every marked vehicle.
- At the Altruist camp, destroy the remaining vans and the Valkyrie, then leave the marked area.
Completion point Leaving the camp after every target is destroyed completes the mission.
What it unlocks next First Dose 6 — Off the Rails.
How to recover the run If the helicopter moves out of easy range, hold cover from ground enemies and use rockets or a long-range weapon when it circles back over the camp.
06 First Dose 6 — Off the Rails
Goal Recover chemicals from Humane Labs and the derailed train, then seize the Brickade 6x6.
Key actions - At Humane Labs, use the keypad, enter the loading area, photograph the manifest and search containers with the crowbar.
- When told to stop the train, drive straight to the switching station and pull the lever before it passes.
- At the wreck, collect the cutting saw, open the rail cars, recover the chemicals, take the Brickade 6x6 and deliver it to The Freakshop through the pursuit.
Completion point Driving the Brickade into The Freakshop completes First Dose and assigns the free vehicle to the lab route.
What it unlocks next The free Setup: Acid Lab Equipment mission and the later paid installation with Mutt.
How to recover the run The switching station is timed: if the train passes, restart from the checkpoint. At the wreck, prioritise the chemicals and Brickade instead of fighting the endless pursuit.
Brickade, equipment and installation — three different things
You earn the vehicle and steal the pallets without buying them. The required payment installs the working lab.
Brickade 6x6 — earned in a mission
Status
This is the free vehicle from the end of Off the Rails, not a purchase required for this route.
- Complete all six First Dose missions as the route leader.
- In the final mission, take the Brickade from the train wreck and deliver it to The Freakshop.
Equipment — a separate free theft
Status
After First Dose, choose one of three yellow equipment markers in south/east Los Santos.
- Enter the warehouse's yellow marker and clear the guards.
- Use the forklift to load all three marked pallets onto the Flatbed; expect reinforcements after the first loads.
- Drive the truck and its cargo to The Freakshop without stopping for unnecessary fights with the pursuit.
Installation — $750,000 base fee
Status
This starts the business; do not confuse it with the later $250,000 Equipment Upgrade.
- Return to The Freakshop and approach Mutt by the workshop and Brickade.
- Choose the Acid Lab installation and confirm the $750,000 base price.
First launch
After installation, you do not return to Liquor Ace. The Acid Lab is a service vehicle requested from the Interaction Menu.
01 Request the lab
ActionGo outdoors and open Interaction Menu → Services → Acid Lab → Request Acid Lab.
How to verifyA service-vehicle icon appears on the map; use the side/rear entrance to the laboratory compartment.
How to recover the runIf the option is disabled, leave any job/interior, return the active service vehicle and retry on an open road; change session if the service state is stuck.
02 Name the product
ActionInteraction Menu → Services → Acid Lab → Product Name; choose any non-default product name.
How to verifyThe selected name remains in the menu and adds 5% to sale value; the site's baseline model is shown before this bonus.
How to recover the runIf the option is missing, verify that Mutt's installation is complete and that you are using the Acid Lab service menu, not the personal-vehicle menu.
03 Register as an owner
ActionBefore sourcing or selling, register as a CEO/VIP or MC President in the Interaction Menu.
How to verifyYour organisation/club state appears in the HUD and the supply/product stations allow missions to launch.
How to recover the runIf registration is unavailable in a public session, move to an invite-only session and register there.
04 Add the first supplies
ActionInside the lab, speak to Mutt and buy supplies or use the supply station to launch a free source mission.
How to verifyCheck the supply and product bars separately; after supplies arrive, production starts automatically unless it is paused.
How to recover the runIf the bar does not rise immediately after a purchase, wait for delivery and Mutt's message; do not order again simply because the shipment has not arrived yet.
05 Activate the daily boost
ActionUse the boost station at the chemical table inside the lab and complete its short interaction.
How to verifyThe HUD confirms the boost; you can now leave the lab and run other online activities.
How to recover the runIf the interaction is unavailable, the daily boost was already used or the lab has not been fully set up.
Supplies and production
The two bars mean different things: supplies are consumed and product is the output.
Buy from Mutt inside the lab or by phone. One full supply delivery does not equal a full product stock.
The product bar consumes supplies; a full-stock solo sale still uses one Manchez Scout C.
A full stock consumes about $192,000 of purchased supplies; this is the least efficient version.
The upgrade halves supply use; a full batch costs about $96,000 in purchased supplies.
Used at the start of a cycle, it cuts a full batch to about 4 hrs 30 min without the upgrade or 3 hrs with it.
You may play other activities; production does not continue after leaving GTA Online.
Buying versus stealing supplies
Buy supplies
$12,000 per missing 20%; up to $60,000 from an empty barMutt delivers the supplies after a short wait while you earn money elsewhere.
Steal supplies for free
$0; requires one or more source missionsLaunch from the supply station inside the Acid Lab. Keep the Brickade outside The Freakshop and be registered as an owner.
BASELINE, NOT AN EVENTThese are permanent baseline-business figures. Weekly bonuses, GTA+ and temporary multipliers do not change this model and are not included in the guide.
Equipment Upgrade
The Equipment Upgrade is a second, later expense. It is not required for the first batch, but it transforms the regular cycle.
After completing Welcome to the Troupe, call Dax in Freemode and choose Request Work. One of five random Fooligan Jobs is assigned.
You need 10 completed jobs in total — each variant does not have to be completed exactly once.
After successfully completing a Dax Fooligan Job, wait about 48 real-time minutes (one in-game day) before requesting another one. The cooldown starts on completion, not when the job is accepted. Rockstar does not publish the exact minute count; aligned current secondary sources support this rule with confidence B.
Check Pause Menu → Stats → Awards → Los Santos Drug Wars → Call Me. The Silver tier corresponds to 10 completions; the game should also show an Equipment Upgrade unlock notice.
Five random Fooligan Jobs
Crop Dustin'
Collect the chemicals and a Duster, spray the rival fields, destroy the tanker and leave the area.
Heavy Metal
Find and eliminate the rival boss, send Dax a photo, recover the stolen goods and deliver them.
Liquid Assets
Break into the farm, contaminate its water, activate irrigation and survive the hallucination sequence.
Working Remotely
Steal a GoPostal van, rig it at LS Customs, enter the compound, sneak away, detonate the bomb and lose the police.
Write-Off
Destroy the Merryweather transports, locate their depot, wipe out the operation and escape the reinforcements.
After the tenth completion, return to The Freakshop workshop, speak to Mutt and buy the Equipment Upgrade for $250,000.
- Cuts full production from about 6 to about 4 online hours.
- Halves supply use: a full batch from purchased supplies costs about $96,000 instead of $192,000.
- Raises full-stock base value from $237,600 to $335,200 before the product-name and public-session bonuses.
First sale step by step
Choose a session first, then launch the sale inside the lab. Run the first attempt without hostile players.
- Request the Acid Lab in Los Santos, enter it and register as a CEO/VIP or MC President.
- Check the product bar. A full stock is optional, but it still means only one bike for a solo player.
- Restock armour and snacks; Manchez Scout C performance mods are recommended but do not block a sale.
- Choose the session deliberately before launching. Do not change session during an active sale assuming the stock is guaranteed to return.
- Inside the Acid Lab, use the product shelf/icon on the right and choose Sell.
- Confirm the value and session. The game places you on the lab's assigned Manchez Scout C.
- You have 20 minutes and receive one of three variants. Read the first objective to identify the route before moving.
Every Acid Lab sale uses the Manchez Scout C. A solo player gets one bike even with full stock; bike count follows organisation members, not product quantity.
Safety or public-session bonus
Safe solo — invite-only session
Benefit
No hostile players and the most predictable first sale.
Risk / failure condition
No High Demand Bonus; you receive the base product value and permanent lab bonuses.
Public session — higher bonus, real risk
Benefit
A successful sale can receive a High Demand Bonus based on other players in the lobby.
Risk / failure condition
Other players can intercept or destroy the delivery. Choose this only after learning the routes and accepting the risk of lost stock.
All three route variants
Paper Boy — 10 basket throws
How to recognise it
The HUD asks you to deliver newspaper-wrapped packages and reveals the baskets one at a time.
Action
Ride to each of 10 points, select the package like a weapon and throw it into the marked basket. Set the next waypoint as soon as it lands.
Tip
Throws are unlimited. If aiming from the bike is difficult, stop out of traffic, dismount and throw on foot.
Risk / failure condition
Rushed missed throws and crashes while watching the target instead of the road waste the most time.
How to recover the run
Do not retrieve a missed package — throw another. If the bike falls, pick it up and continue; while the HUD shows time and new points, the run remains active.
Stash — 5 hiding locations
How to recognise it
The map shows five areas, each with several possible stash spots.
Action
At each area, choose the nearest safe spot, dismount, stash the package and return to the Manchez. Repeat for all five areas.
Tip
Park facing the exit and avoid boxing the bike into an alley; a short walk is better than reversing under fire.
Risk / failure condition
Witnesses or hidden police may trigger a two-star wanted level. You cannot stash the next package until the wanted level is cleared.
How to recover the run
Ride away immediately, break line of sight in alleys/a tunnel and wait for the stars to clear; if the mission allows it, a Lester call can remove this ordinary wanted level.
Police Sting — garage and backup buyer
How to recognise it
There is one parking-garage target; grey/black unmarked cars and vans with dark windows sit near the entrance and on the levels.
Action
Do not ride blindly to the roof. Identify an undercover vehicle on a lower level, trigger the ambush with an escape route ready, ride away and lose the police. Once clear, follow the HUD to the new buyer marker and deliver the product.
Tip
The safest plan is to trigger the pursuit near the exit and escape under bridges or into a tunnel instead of fighting the whole rooftop ambush.
Risk / failure condition
This pursuit cannot normally be removed by calling Lester. Stopping to fight leaves the bike and product exposed.
How to recover the run
If health drops, use armour/snacks while escaping and focus on breaking line of sight. Do not return to the delivery until the stars are gone and the correct final marker appears.
After the final marker, wait for the completion screen and return to Freemode. Verify the deposit and the empty/reduced product bar. Product-name and High Demand bonuses sit on top of the baseline model; weekly multipliers are not assumed here.
Operating and earning loop
A simple cycle after the first successful sale — without idling beside the lab.
- 01
At session start
Request the Acid Lab, check both bars and use the daily boost if available.
- 02
Refill supplies
After upgrading, buy a full bar from Mutt; before upgrading, steal if conserving cash. Do not wait for both bars to empty.
- 03
Earn while production runs
Stay online and run Fooligan Jobs, missions or other paid activities; the lab works in the background while supplied.
- 04
React to Mutt's messages
After a delivery or supplies-out message, return or call Mutt; check the actual product bar before selling.
- 05
Sell at your chosen threshold
Run early sales in invite-only. Once you know all three routes, deliberately decide whether the public bonus is worth the risk.
- 06
Start the next cycle after settlement
Check remaining supplies, order the missing portion and return to online activities. Do not idle in the lab.
Common mistakes and fixes
Buying a Brickade before First Dose
FixOn this route, earn it free in Off the Rails; the first required payment is the $750,000 installation.
Confusing First Dose with Fooligan Jobs
FixFirst Dose unlocks the vehicle and installation. Fooligan Jobs launched by calling Dax count toward the later Equipment Upgrade.
Trying to pay before stealing the equipment
FixAfter Off the Rails, first complete the yellow Setup: Acid Lab Equipment and deliver three pallets; only then will Mutt offer installation.
Assuming $60,000 of supplies fills product stock
FixThat fills the supply bar, not product stock. A full batch consumes more than one bar; with the upgrade, purchased supplies total about $96,000.
Waiting for production offline or without supplies
FixProduction needs supplies, an active state and online time. Check that Mutt has not paused it.
Treating a weekly event as the permanent rate
FixCompare the deposit with the business baseline; check temporary multipliers separately and do not plan the next cycle as if they were permanent.
First full sale in a crowded lobby
FixLearn the three variants in invite-only first; choose the public bonus only when you have an escape plan.
Checklist: have / done / ready to sell
I HAVE
Ron as a contact and the yellow R at Liquor Ace, or The Freakshop already unlocked.
The free Brickade 6x6 delivered in Off the Rails.
The three pallets of lab equipment delivered to The Freakshop.
$750,000 for installation; the later $250,000 upgrade does not block first production.
I HAVE DONE
All six First Dose missions in the correct order.
Mutt's installation and the first Acid Lab request.
Product naming and the first supply purchase or theft.
Ten Fooligan Jobs and the Equipment Upgrade — recommended before regular farming.
I CAN SELL
The product bar is not empty and Sell is active at its icon.
I am registered as a CEO/VIP or MC President.
The Acid Lab is requested, the Manchez Scout C is available, and armour/snacks are stocked.
I chose a session: invite-only for safety or public with deliberate risk.
Recovery paths
Check the saved prerequisite first, then the session state. Do not buy another vehicle as a progression-bug workaround.
Missing R, D or equipment marker
Check in order
- R: wait for Ron's Freemode call and inspect Liquor Ace in Sandy Shores.
- D: after mission one, look for the yellow D outside The Freakshop; later First Dose missions start there.
- Equipment: it appears only after properly completing Off the Rails and delivering the Brickade.
Dax will not offer a Fooligan Job
Check in order
- Welcome to the Troupe must be complete and Dax must appear in contacts.
- Call in Freemode and select Request Work, not Replay Mission or Mutt's supplies.
- A cooldown may still be active after a recent completion; run another activity and retry when work becomes available.
I cannot find the Brickade or lab entrance
Check in order
- Leave interiors and jobs, open Services → Acid Lab and choose Request Acid Lab.
- Check the service-vehicle icon; it may spawn on the nearest wide road rather than beside the character.
Production is stopped
Check in order
- Check supplies: an empty bar stops production immediately.
- Speak to Mutt and make sure production was not manually paused.
- Production accrues only while playing online; the boost does not replace supplies.
The sale was interrupted or failed
Check in order
- After returning to Freemode, request the lab and inspect the actual product bar and deposit.
- Do not assume a forced quit or session change preserves the whole batch; the save outcome depends on interruption timing.
03
Expanded informational overview
Guide scopeThis section organizes the complete cycle: requirements, phases, figures and dependencies. The detailed operation flow is in the walkthrough above.
Time and hourly results include stock or income accrual. The final delivery is only one part of the complete cycle.
04
How the full cycle works
This section complements the walkthrough with full-cycle dependencies: unlock, preparations, finale, settlement and the next available attempt.
Purchase and unlock
The base requirement is Lab installation; the minimum entry cost is shown in the financial panel.
Setup
The business must be configured and remain active. Upgrades should be evaluated separately from the property price.
Production / accrual
The full time model uses 4 hrs as the typical cycle.
Sale or collection
The panel separates owner proceeds, costs, commissions and extra helper rewards.
Next cycle
There is no separate sale cooldown; another full result requires a new production cycle.
05
What affects the result
The range shows small, typical and full variants where value is variable.
Supply costs and agent fees are deducted before the owner's result.
Owner proceeds plus a separate reward for each helper. The sale value is not split equally.
The comparison uses 3 hrs / 4 hrs / 6 hrs for the complete cycle.
Main strengths
- Can combine active sales with passive value accrual.
- Helpers do not automatically reduce the owner's proceeds.
Constraints
- Purchase payback depends on regular use.
- A helper's reward can be far lower than the owner's proceeds and is shown separately.
06
Solo / Duo / Trio / Quatro variants
Every supported team size shows its host, partner and team model. Provisional rates are clearly labelled, and incomplete data is explained alongside the result.
Solo: full pace control and no crew wait.
- Host / owner
- $239,200
- Team net
- $239,200
- Production cycle
- 4 hrsrange: 3 hrs–6 hrs
Duo: the owner keeps the proceeds and 1 helper receive separate rewards.
- Host / owner
- $239,200
- Each partner
- $33,520
- Team net
- $272,720
- Production cycle
- 4 hrsrange: 3 hrs–6 hrs
Trio: the owner keeps the proceeds and 2 helpers receive separate rewards.
- Host / owner
- $239,200
- Each partner
- $33,520
- Team net
- $306,240
- Production cycle
- 4 hrsrange: 3 hrs–6 hrs
Quatro: the owner keeps the proceeds and 3 helpers receive separate rewards.
- Host / owner
- $239,200
- Each partner
- $33,520
- Team net
- $339,760
- Production cycle
- 4 hrsrange: 3 hrs–6 hrs
07
Complete figures by team
Typical values for the selected cycle; every cell also contains a min–max range.
| Team | Cooldown | Team gross | Costs + fees | Host / owner | Each partner | Team net | Host / owner $/h | Team $/h |
|---|---|---|---|---|---|---|---|---|
| SOLO | 4 hrsProduction cycle • range: 3 hrs–6 hrs | $335,200min: $335,200 · typical: $335,200 · max: $335,200 | $96,000min: $96,000 · typical: $96,000 · max: $96,000 | $239,200min: $239,200 · typical: $239,200 · max: $239,200 | — | $239,200min: $239,200 · typical: $239,200 · max: $239,200 | $59,800min: $59,800 · typical: $59,800 · max: $59,800 | $59,800min: $59,800 · typical: $59,800 · max: $59,800 |
| DUO | 4 hrsProduction cycle • range: 3 hrs–6 hrs | $335,200min: $335,200 · typical: $335,200 · max: $335,200 | $96,000min: $96,000 · typical: $96,000 · max: $96,000 | $239,200min: $239,200 · typical: $239,200 · max: $239,200 | $33,520min: $33,520 · typical: $33,520 · max: $33,520 | $272,720min: $272,720 · typical: $272,720 · max: $272,720 | $59,800min: $59,800 · typical: $59,800 · max: $59,800 | $68,180min: $68,180 · typical: $68,180 · max: $68,180 |
| TRIO | 4 hrsProduction cycle • range: 3 hrs–6 hrs | $335,200min: $335,200 · typical: $335,200 · max: $335,200 | $96,000min: $96,000 · typical: $96,000 · max: $96,000 | $239,200min: $239,200 · typical: $239,200 · max: $239,200 | $33,520min: $33,520 · typical: $33,520 · max: $33,520 | $306,240min: $306,240 · typical: $306,240 · max: $306,240 | $59,800min: $59,800 · typical: $59,800 · max: $59,800 | $76,560min: $76,560 · typical: $76,560 · max: $76,560 |
| QUATRO | 4 hrsProduction cycle • range: 3 hrs–6 hrs | $335,200min: $335,200 · typical: $335,200 · max: $335,200 | $96,000min: $96,000 · typical: $96,000 · max: $96,000 | $239,200min: $239,200 · typical: $239,200 · max: $239,200 | $33,520min: $33,520 · typical: $33,520 · max: $33,520 | $339,760min: $339,760 · typical: $339,760 · max: $339,760 | $59,800min: $59,800 · typical: $59,800 · max: $59,800 | $84,940min: $84,940 · typical: $84,940 · max: $84,940 |
CALCULATOR
Custom scenario calculator
Enter sale value, cycle cost and production or completion time.
08
Key facts
VIDEO
Video walkthrough
Verified video · EN
The ONLY GTA Online ACID LAB Guide You NEED to Make MILLIONS Completely Solo
Unlock, setup, production and solo sale.
- Channel
- Hazard
- Published
- 15 Aug 2026
- Checked
- 29 Aug 2026